Hiking to the Palisade Glacier from Second Lake on the Big Pine North Fork Trail
Palisades Glacier is one of the southernmost glaciers in North America, and it sits right around 12,4000 feet. It is accessed by a short but challenging trail that splits off from the Big Pine North Fork Trail. Getting there is an incredible accomplishment, but one that shouldn’t be taken lightly as you have to deal with elevation (over 12,000 feet), class 3 scrambling to the ridge, and just overall distance. If you are interested in doing it, then read on for all the information.

Details
- 19 mile round trip from the trailhead, 8 miles round trip from Second Lake
- 5,000 feet from the trailhead, 2,500 feet of gain from Second Lake
- This information is from my trip in 2016
Getting There
This hike can technically be done in a day, but I would not trust myself to do it in a day, and so I wouldn’t recommend trying that. I did it as part of a backpacking trip along the North Fork of Big Pine, and this post talks about the trail as it leaves from Second Lake. If you are interested in the portion from the trailhead to Second Lake, then read all about it here.
Video
Here is a video showing the highlights of the 2-day trip.
The Trail
I hiked this trail with my friend Chris from LastAdventurer.com. We set out on the trail at around 8 AM after watching the sunrise and drinking coffee.
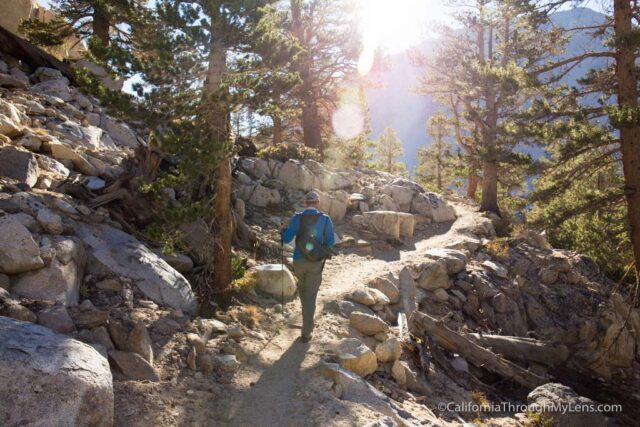
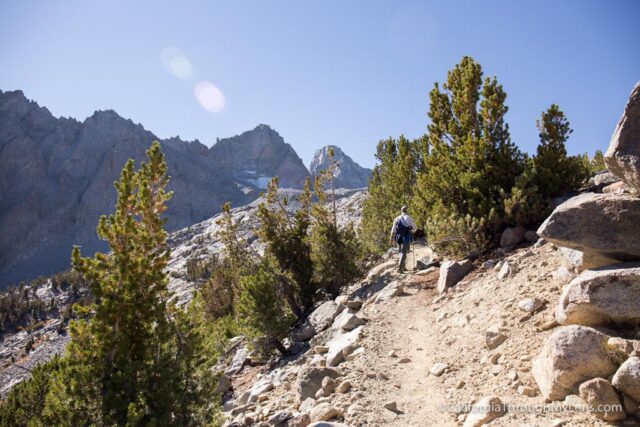
The trail leaves from Second Lake on a well-maintained path that starts gradually climbing as you head out from the lake.
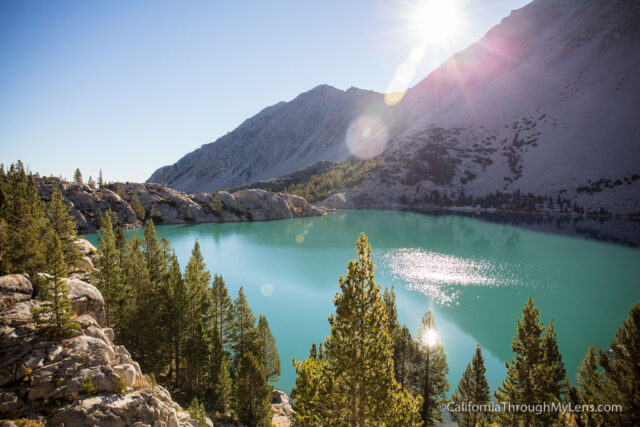
Third Lake
Within a half mile or so, you will get your first glimpse of Third Lake, which is another glacier-fed lake that is beautiful like First and Second Lake. We walked down to the shore of Third Lake as the water was pristine in the early morning light.
Heading back to the trail, we started up the switchbacks that take you up in elevation quickly, and you will soon be looking down on Third Lake below you.
The switchbacks eventually end in a small meadow, and you will walk along a shaded path for about a tenth of a mile.
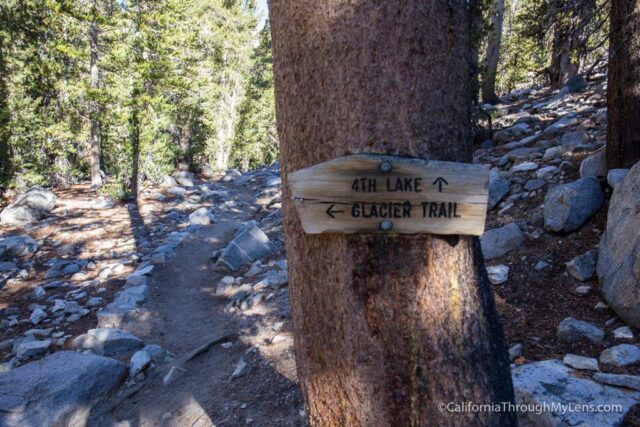
From here, the trail splits, and you will be heading down on the path to Glacier Lake, not Lakes 4-7.
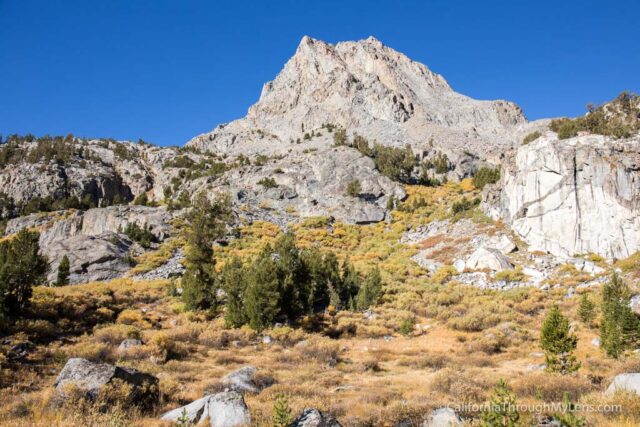
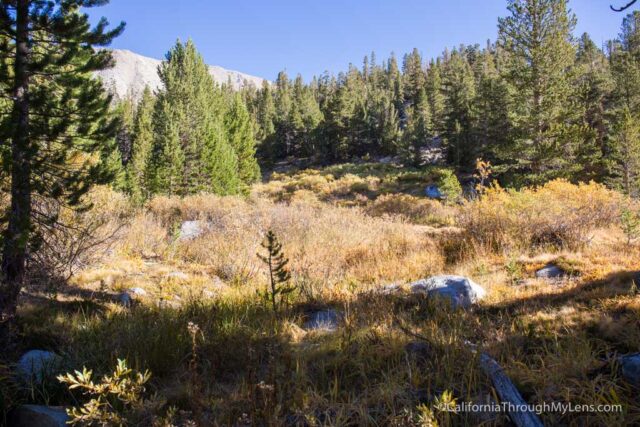
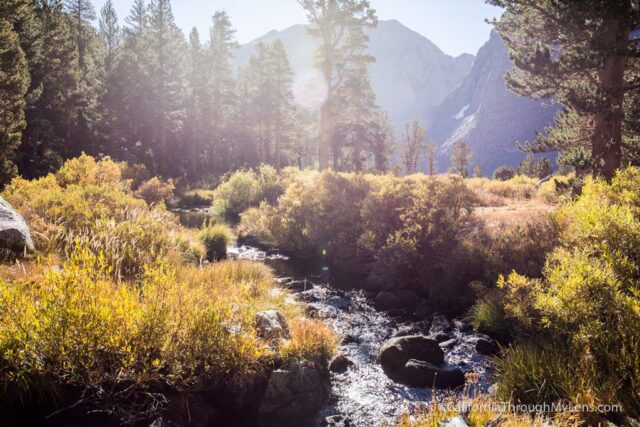
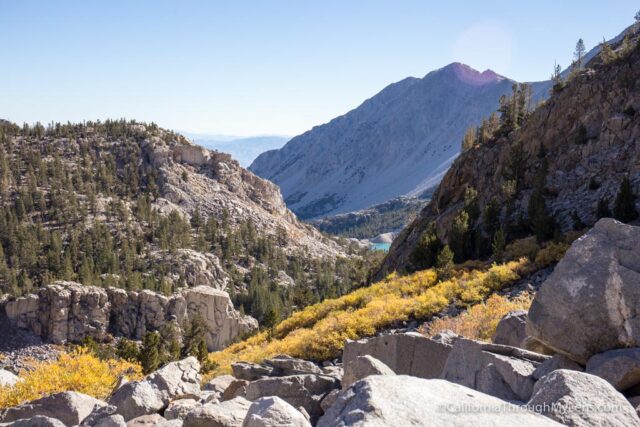
This part of the trail is fantastic as you enter a large meadow with daunting peaks above you and a bubbling creek running down the middle.
We went during the fall, which is why the colors were so amazing in their orange and golds.
Crossing the stream, you will then head up on a bunch of switchbacks for the next 3/4ths of a mile.
This is where the trail starts to get hard as you just keep going up and up until you reach right around 11,000 feet.
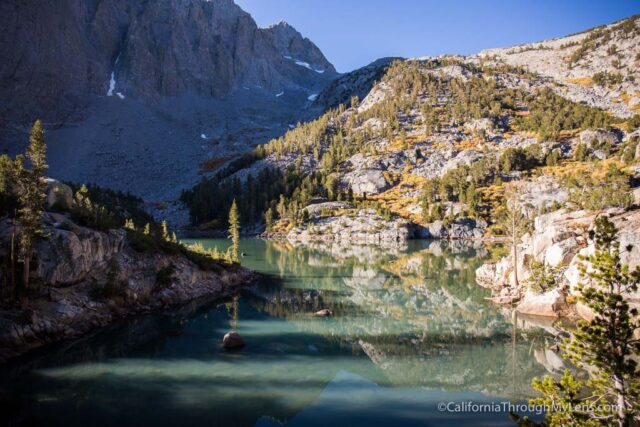
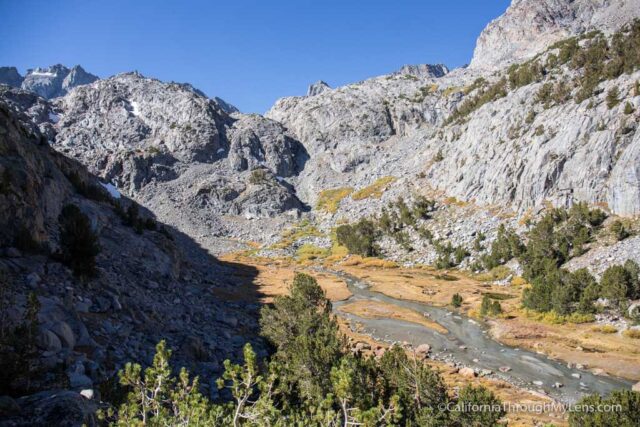
Sam Mack Meadow
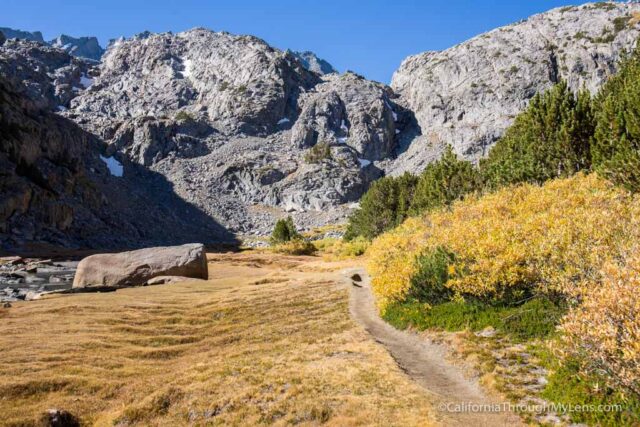
At 11,000 feet, the trail flattens out, and you enter Sam Mack Meadow. Sam Mack Meadow is a pristine high altitude meadow with large granite rocks, foliage, and a creek running down the middle. This is an excellent place for a break as you filter water and take in the surrounding landscape.
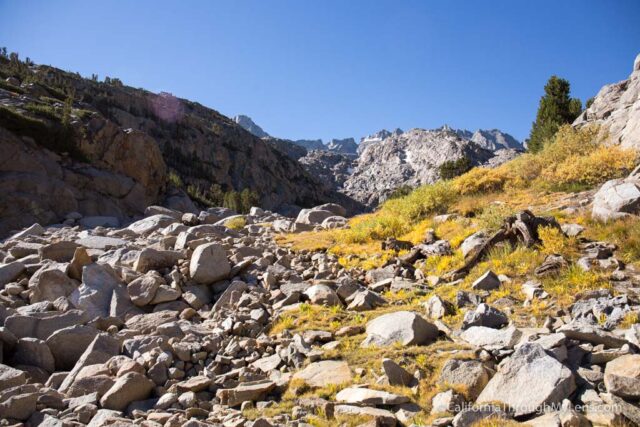
From here, the trail gets tough. You will be leaving the meadow and heading up more switchbacks that are less and less maintained, which means that the path has large uneven rocks in it that slow your pace.
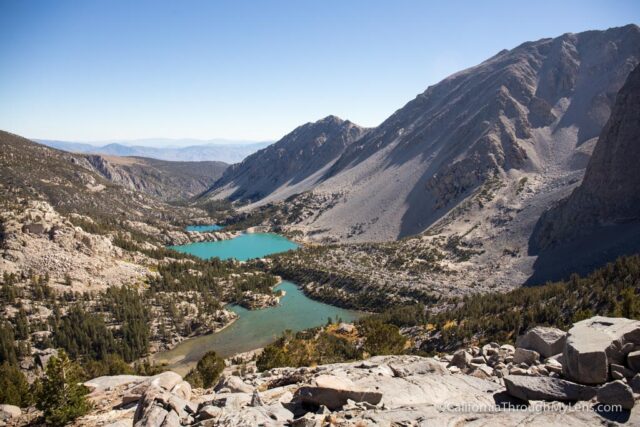
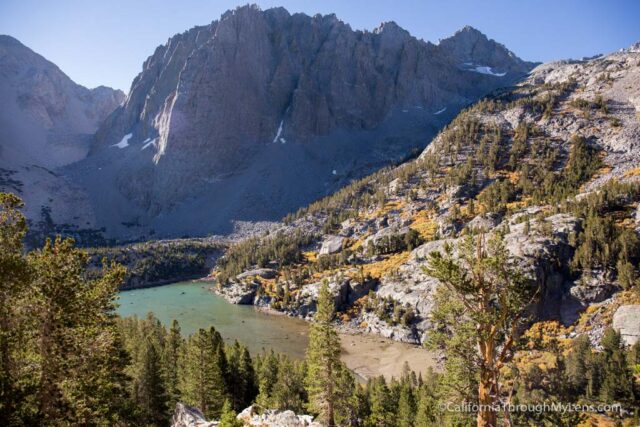
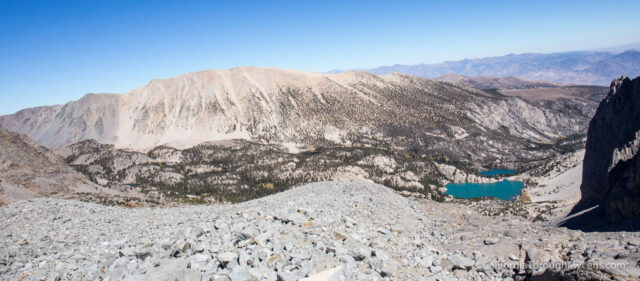
Eventually, you will reach a vista point that looks down on lakes 1-3 with 4-7 being able to be seen out in the distance as well.
The trail then continues its upward trajectory as it climbs more and more switchbacks until you are at around 11,700 feet.
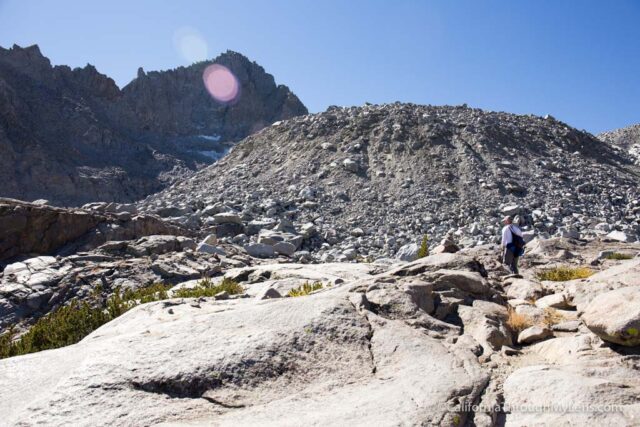
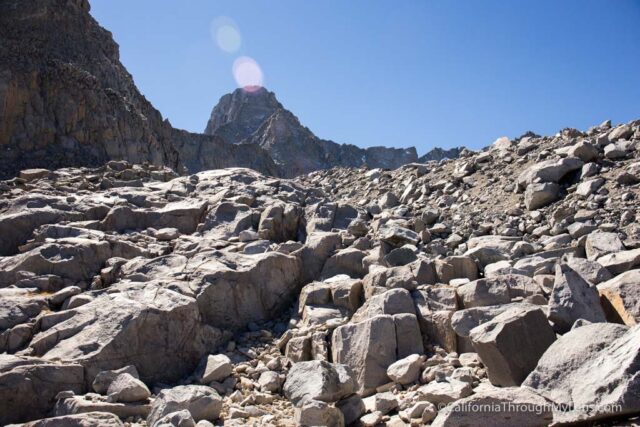
At this elevation, the trail officially “ends,” and you will be doing about a half mile of tough, class three scrambling up a talus slope before you can see the glacier.

This part is incredibly tough and shouldn’t be taken lightly. The trail is hard to find, and the rocks are prominent in your path. When we went, there were cairns that you could follow over the stones, and that led you up the trail. I am sure that during different parts of the year these are gone, so make sure you have a GPS or a map with some idea of where you are going so you don’t get lost.
This section hugs the side of the mountain for a little while, and you will be climbing over rocks in a very exposed area, so be careful.
When you make it around the side, you will then have about 300 feet straight up to get to the glacier overlook. This part is not as exposed as the previous, so you can take your time, follow the cairns, and find the best route up.
You will cross over 12,000 feet here, so be prepared to be very winded. Be sure to note any symptoms of altitude sickness and immediately turn around if you get them. Continuing up the rocks, you will eventually see the ridgeline in front of you, which is your destination.
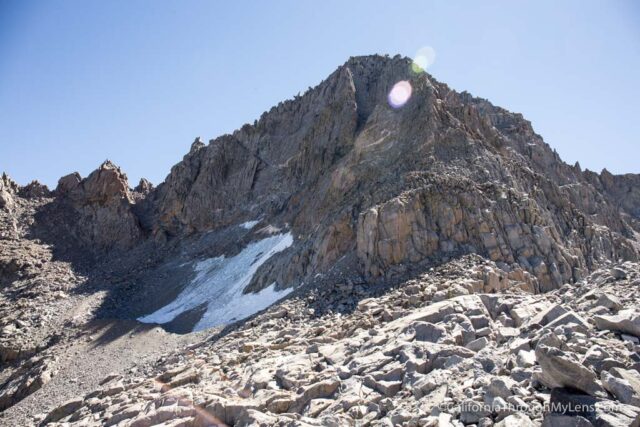
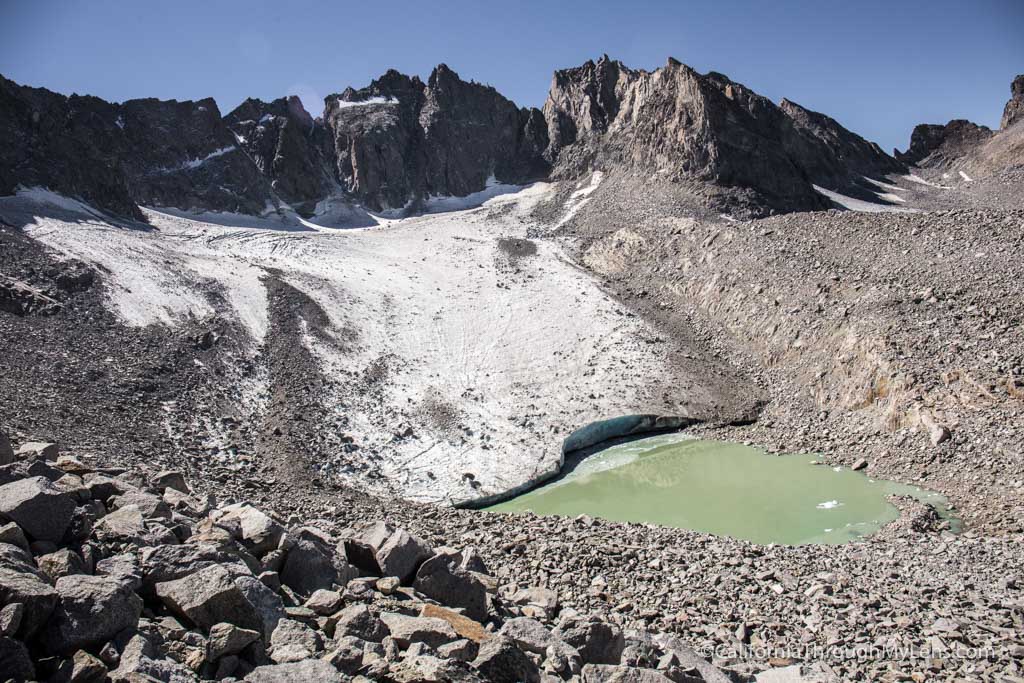
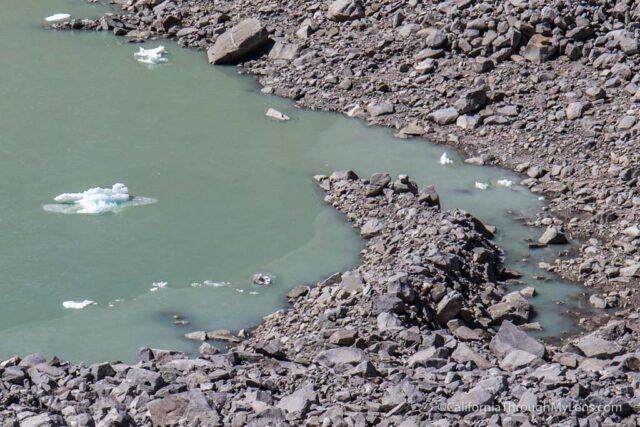
When you finally crest over the ridgeline, you will be looking down on the Palisades Glacier.
Palisades Glacier
This glacier is imposing from this viewpoint as it is large and has a big pool below it.
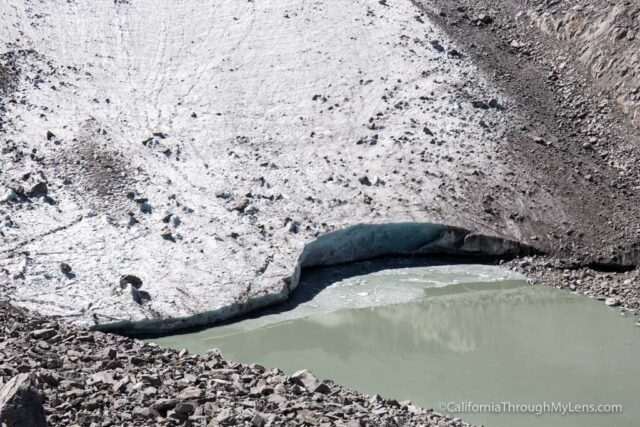
The viewpoint is still a good 200 feet above it though, and if you wanted to get down to the water, you would have to climb down the talus rock and then back up the way you came.
We were both tired from the climb and still had to make it all the way back out, so we just looked at it from the overlook and didn’t go down. After eating some lunch and taking it all in, we headed back down the trail the way we came. Be extra cautious on the way down as it is more likely you would fall going down than going up.
This is a fantastic hike to a truly spectacular piece of California. Be sure not to take it lightly if you go and be careful. Let me know if you have been in the comments and what you thought.