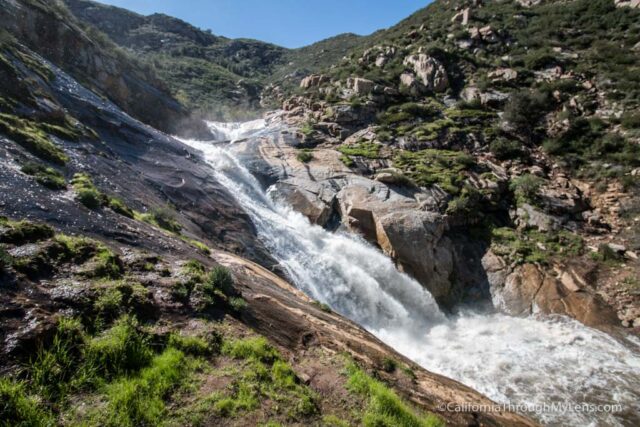
Three Sisters Falls: San Diego County’s Three Tiered Seasonal Waterfall
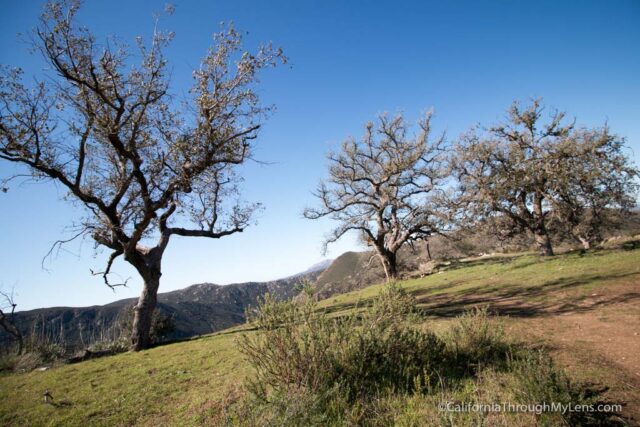
Three Sisters Waterfall, about 30 minutes south of Julian, is one of the premier Southern California waterfalls when it is flowing. This set of falls cascade over the rocks, and there are three main waterfalls (making up the three sisters). It is best to visit after a good season of rain. While the area is a spectacular spot to explore, be sure to note that it is very steep getting into and out of the canyon. You shouldn’t visit if you aren’t prepared for a more intense hike. Here is all the information. Note that it can get very hot, be prepared with more than enough water, especially in the summer.
Details
- 4 miles round trip
- 1,000 feet of elevation
- Plan on 3-4 hours of hiking
- Display an Adventure Pass for parking
- Bring hiking poles and shoes with good grip; they help a lot
- Location: Search “three sisters falls trailhead” on Google Maps
- This information was from my visit in 2017, I think the trail may be a little different now
- Read all about my favorite California waterfalls here
Getting There
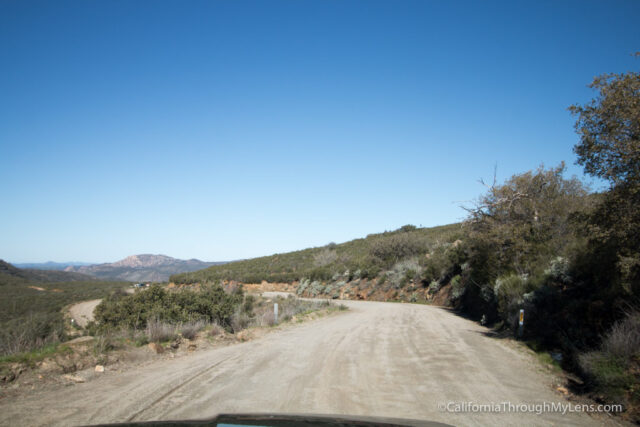
From the town of Julian, you will head west on Highway 79 / Julian Road. You will then turn left on Pine Hills, right on Eagle Peak, then left on Boulder Creek Road. This road will eventually become a dirt road for the last 5 miles of the drive. It was easily passible by a two wheel drive car when I went but do note that it may not be after a good rain. If you are driving here, use Google Maps to confirm these directions, as that is what I used to get there as well. When you get to the trailhead, you will see a gate and cars pulled out along the road (this is why Google Maps is nice to use). Display your Adventure Pass then start the hike.
The Hike
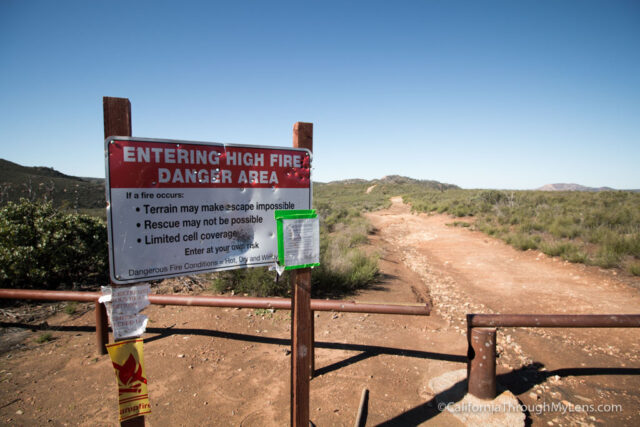
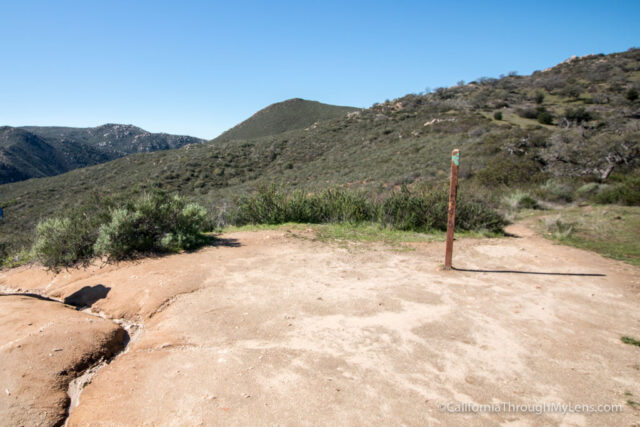
The hike starts at the gate that keeps cars from driving out onto the dirt road you are walking.
It then heads along a flat trail for about half of a mile. There is a small shaded area that looks picnic-friendly along the way. This is pretty much the only shade on the trail, and I would not recommend you hike it in the heat of summer.
After heading downhill for a little bit, you will reach a spur where you head off to the left to continue the trail.
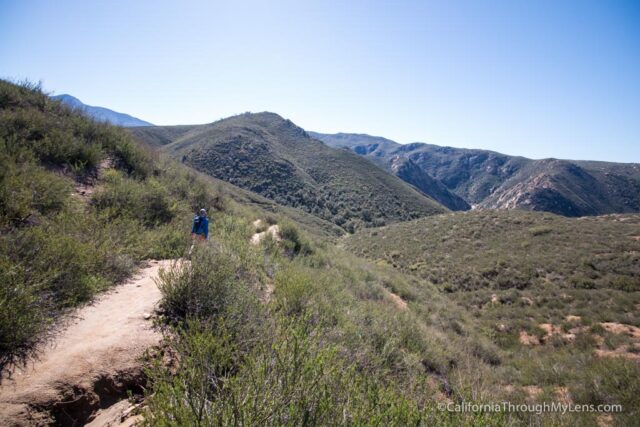
From here you continue downhill until you get to a small creek crossing.
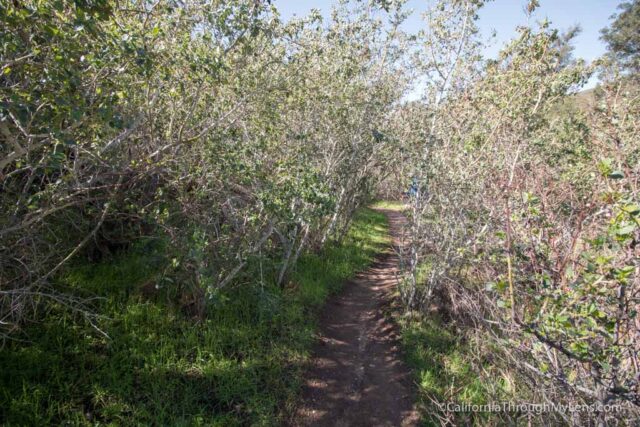
After going over the creek, you will be in a shaded section of plants for a little bit while you hug the hill.
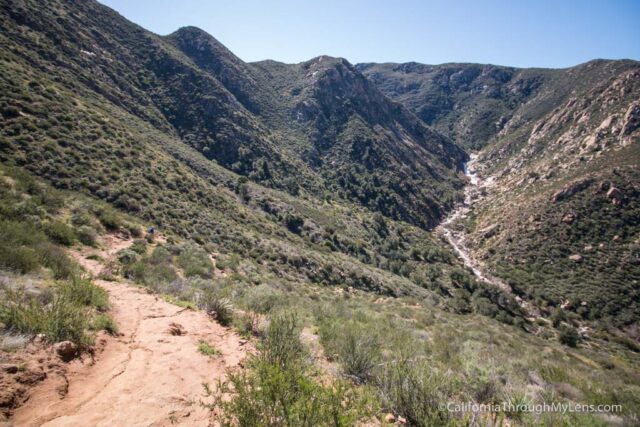
Once you exit the plants, you will then continue until the trail comes around the mountain and heads left. From here, you can see the waterfall in the distance, but it is still far away.
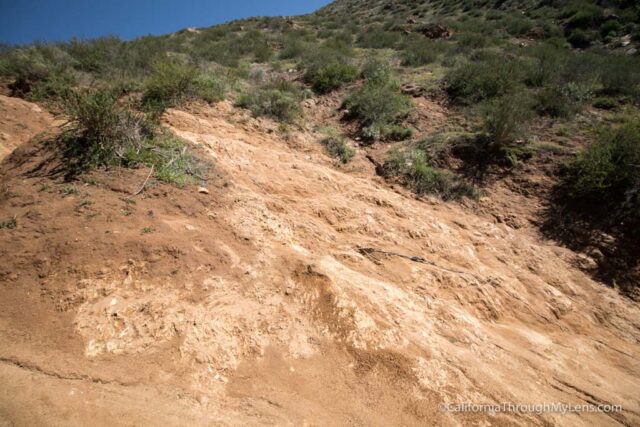
This is where the trail gets more intense. You will descend around 700 feet in about a quarter of a mile. It starts gradual but then it arrives at the section that you always hear about. The below photo shows that part of the trail from above.
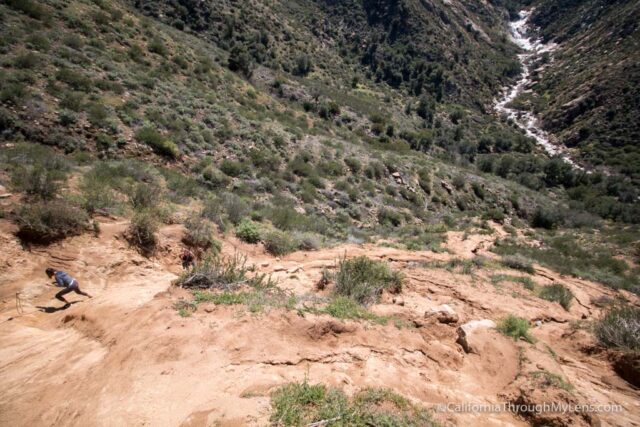
This section is steep, and three ropes have been installed to help people get down. I would not trust these myself as they are not the type of ropes that would hold up after a long time sitting in the sun.
I opted to use a hiking pole and just make my way slowly down the path. I highly recommend you bring a hiking pole as it does help you balance in this steep section.
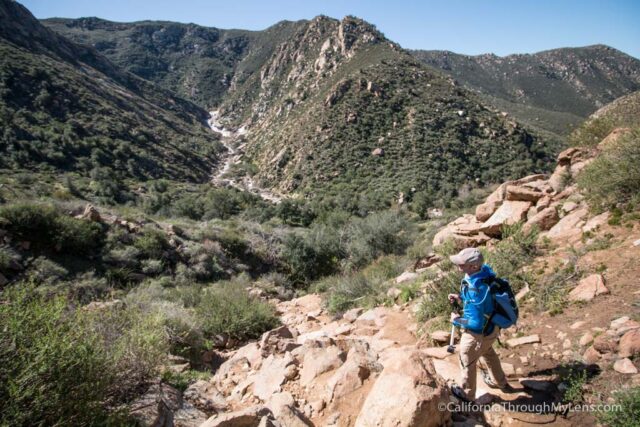
There are two more steep sections with ropes, but they are less steep than the first long section. Just remember that if you do not feel comfortable with this area on the way down, you have to get back up it on the way out of the canyon. Don’t push yourself if you do not feel safe.
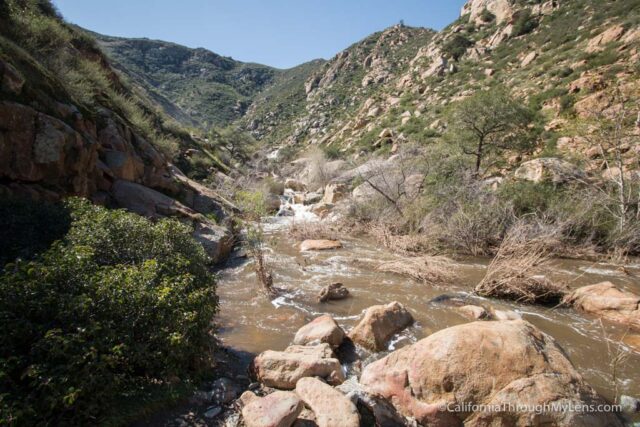
When you make it to the base, you will be following a small creek that leads to the main river/stream. This part of the trail has lots of different offshoots and options, but I recommend just staying near the water as you head up.
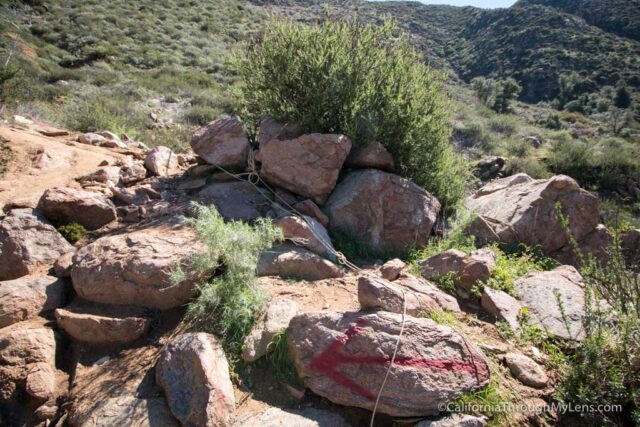
There were red arrows painted on the rocks that showed us which way to go as well, but again there seemed to be a lot of options, and you could take whatever way you felt most comfortable with.
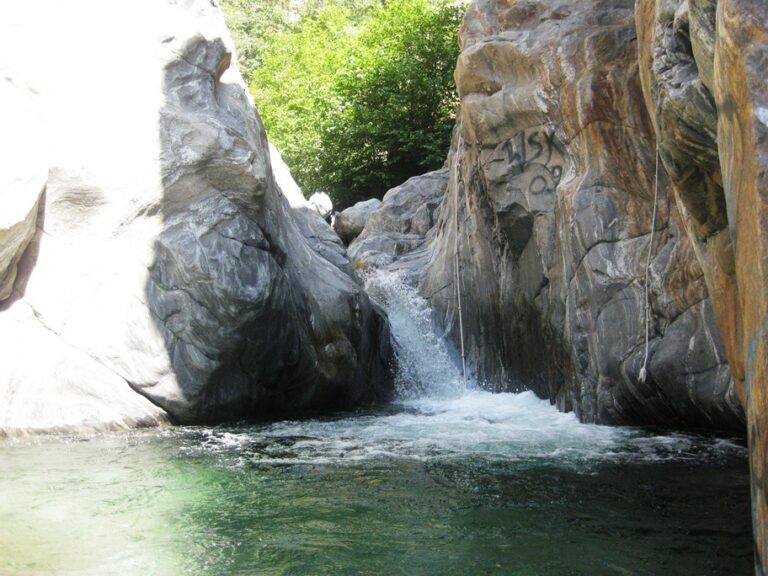
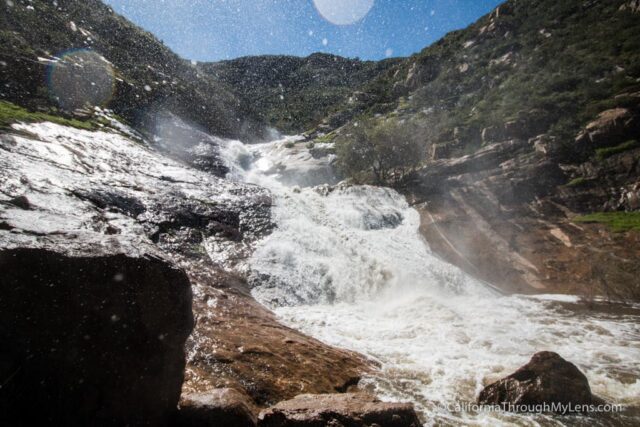
When you finally make it to the base of the first waterfall, you will no doubt be in awe of this magnificent area. I was blown away by how beautiful it was and how much water was flowing over it.
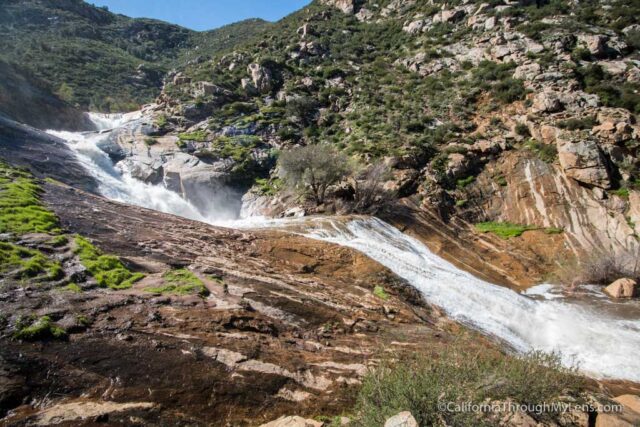
We found a path that took us around the first tier and up to an overlook for the second. Please be careful if you continue hiking in this area and note the slippery rocks. I saw a couple of people almost have bad falls because they didn’t think the rocks would be slippery.
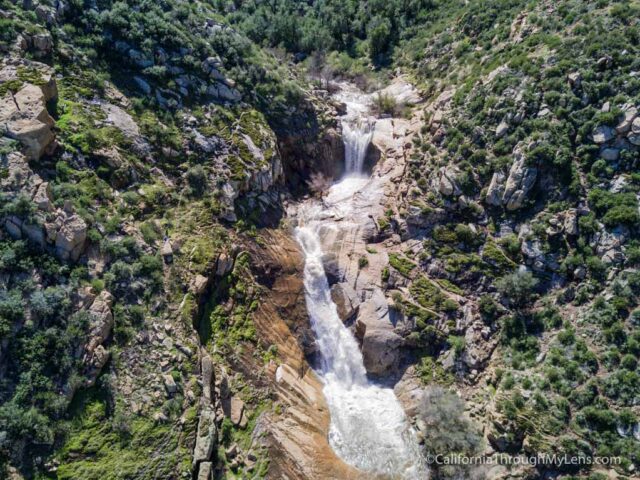
From here, we found a trail that took us up to an overlook for the third falls as well. The trail down to the base was not safe, so we made this our turnaround point.
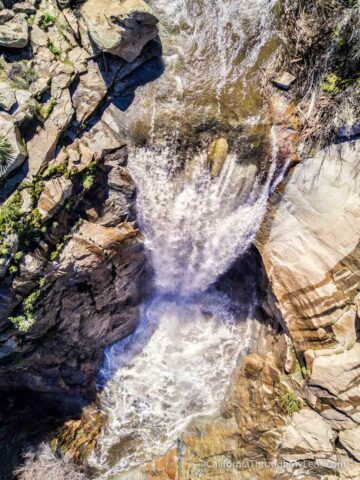
I got out the drone and took a few shots, but this is a pretty tough spot to fly.
From here, it is a tough 2 miles back out of the canyon. Do not underestimate this as it is a good climb and one that you need to take your time on. Also, be sure to bring a lot of water as there is no shade and you will need it.

Video
Here is a video I made of the hike.
This is a fantastic hike that I highly recommend after a good season of rain, but make sure you are careful when attempting it. It is easily one of the best waterfalls I have seen in Southern California. Let me know what you think in the comments.