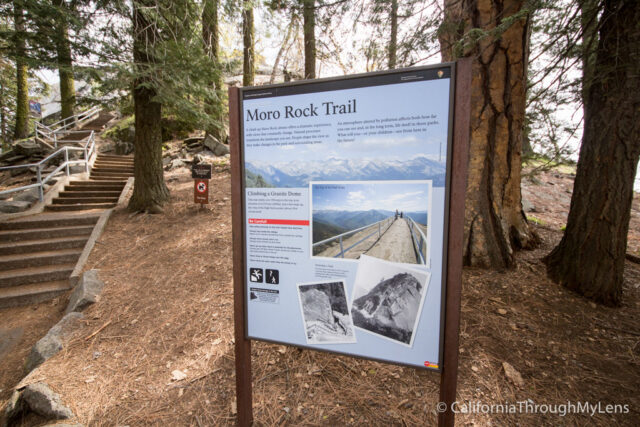
Moro Rock: Sequoia National Park’s Granite Dome
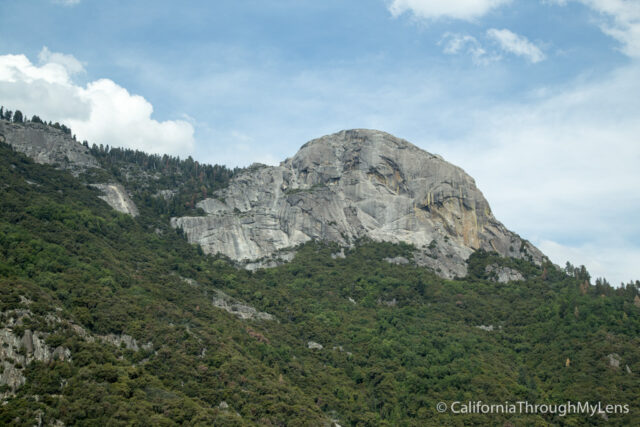
Much like Yosemite has Half Dome, Sequoia National Park has Moro Rock. While nowhere near as daunting, it is still an awesome way to get your adrenaline going and see a fantastic view of the park, all with less than a mile of walking. When you enter Sequoia National Park from the south side, you will be greeted by Moro Rock, standing tall in the distance. This sizeable domed slab of granite is one of the most popular attractions in the park, and rightly so. It is an easy hike that gives you a fantastic view of the entire valley, and I highly recommend it on any trip to the park. Here is all the information if you want to check it out.
Details
- .5 miles round trip
- 250 feet of elevation
- The entire trail is granite stairs, and if you are afraid of heights, you might want to skip it.
- I did this in 2016, 2018 and 2020
Getting There
About 30 minutes from the park entrance, after going up the 90-degree turn switchbacks called a road, you will reach the turnoff for Moro Rock. During the summer you cannot drive on this road on weekends and holidays as it is busy and you must use the shuttle. When we went, it was before this time, and we were able to drive to the parking lot itself.
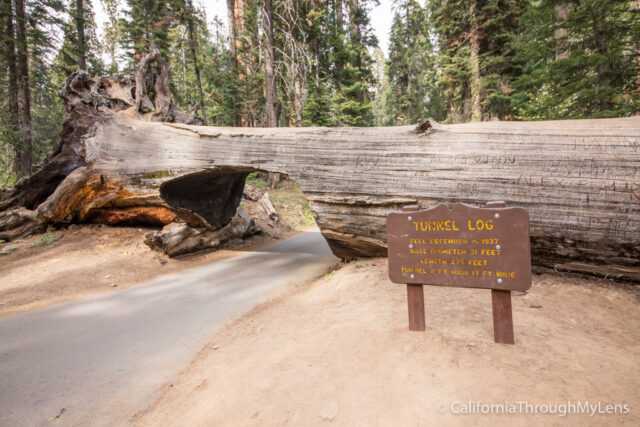
Do make sure to visit the tunnel log when you are there as it is very close to the parking lot and is fun to drive through.
Video
Here is a video I made of the trail last time I visited.
Moro Rock Trail – Day Time
From the parking area, you will see the large granite rock right in front of you, and no doubt there will be many people on the trail. Be safe, and if the forecast says it will rain, then stay away.
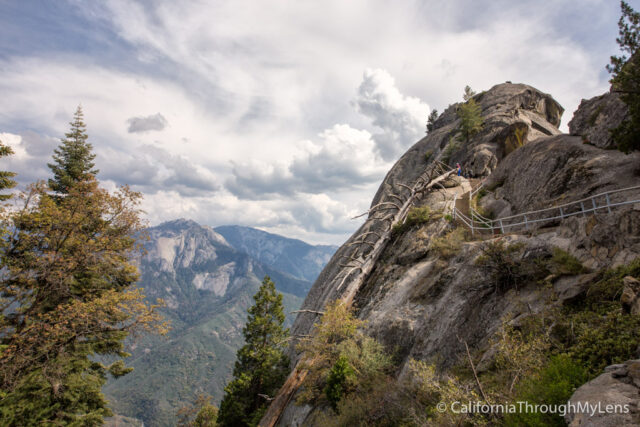
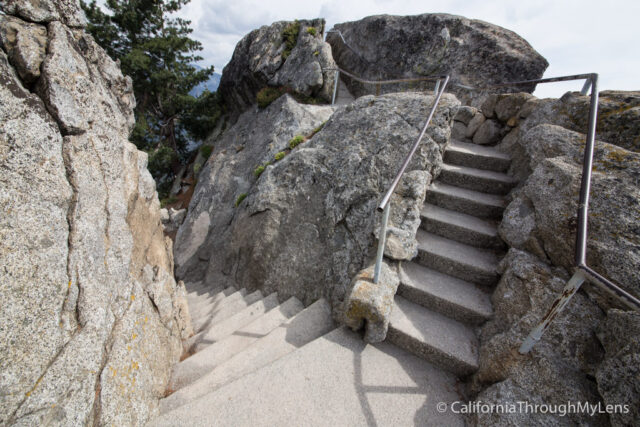
The trail starts relatively easy with some flat sections and a few sets of stairs. As soon as you head up the rock itself though you will begin to see the large drops on each side and start to feel the elevation.
This trail is not difficult though, as it is short; just make sure to take your time, and you should make it to the top. I saw people of all levels of physical activity and ages climbing up it.
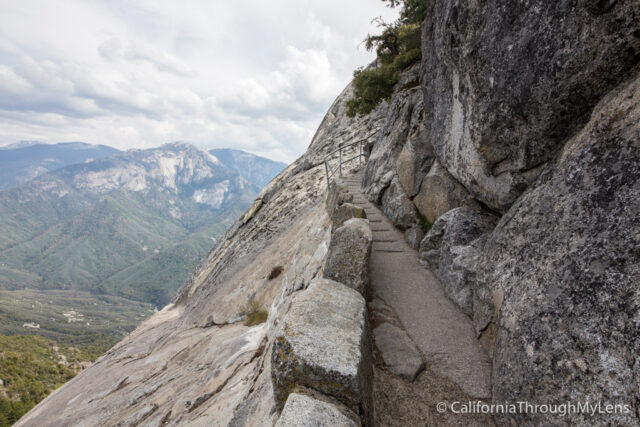
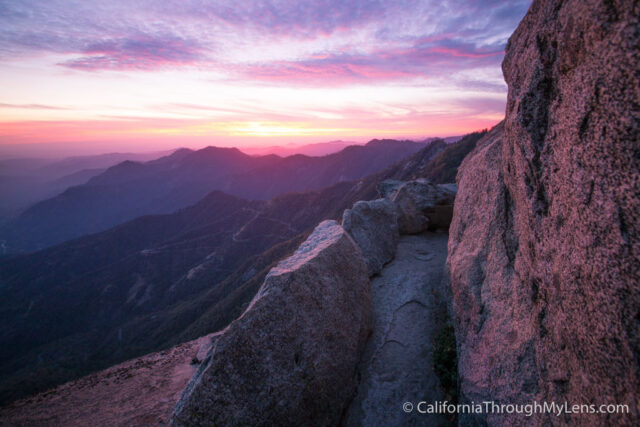
The trail keeps heading up, and you will soon start to see better and better views. There are even a few sections where you can tell the path was cut right out of the rock itself as they have tight overhangs that you walk under.
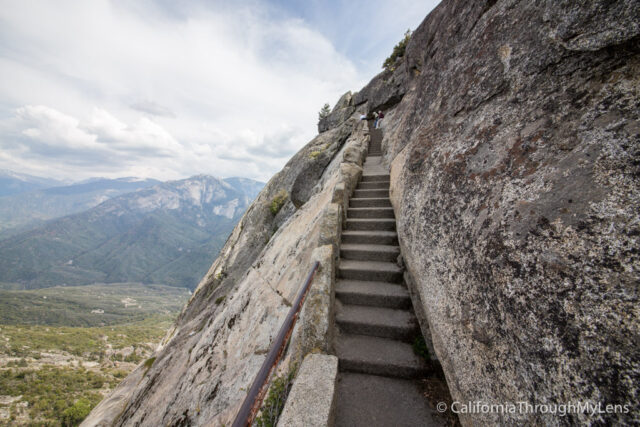
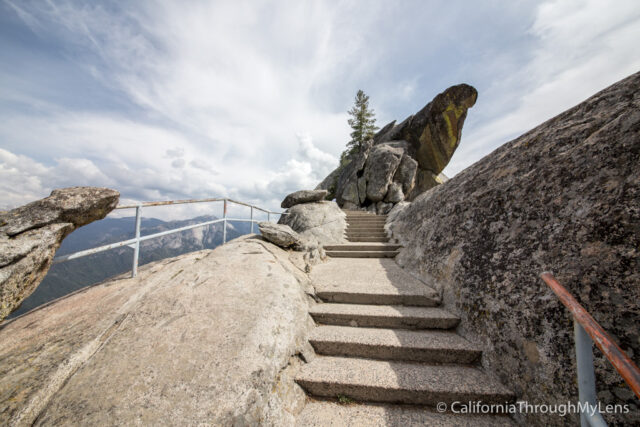
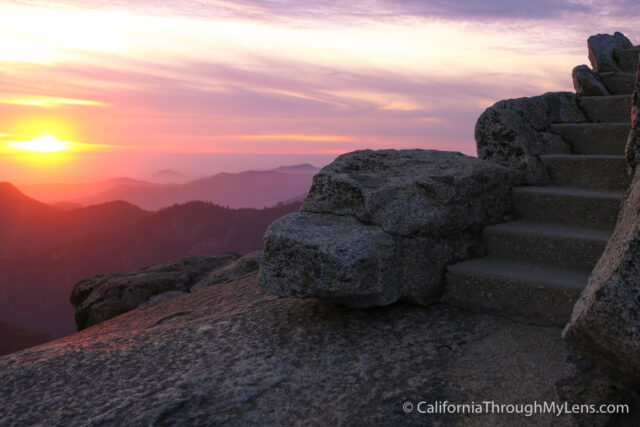
Near the top, there are a few small switchbacks before you reach a straight section of stairs that takes you to the top of the rock.
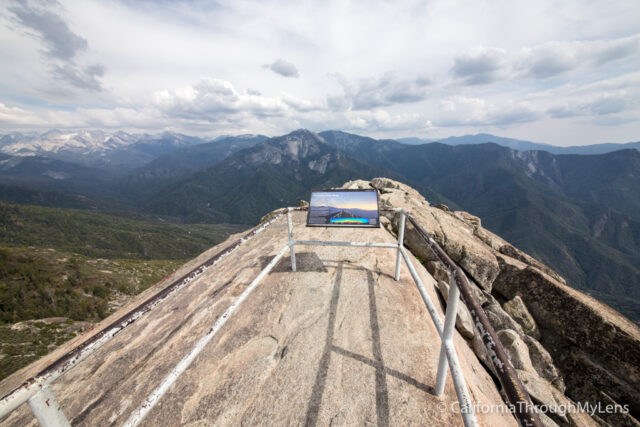
From here, there are safety rails, but make sure to watch your children, so they do not get too close to the edge. You are pretty much just standing on a massive exposed rock.

This vantage point provides a 360-degree view of the entire valley, and it is absolutely amazing. There were snowcapped mountains, lush forests, and views that went on for miles.
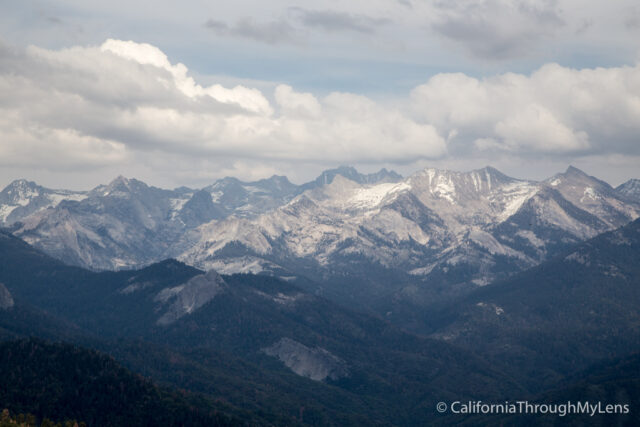
There are a couple of plaques that teach you about the area and the surrounding peaks when you are at the top.
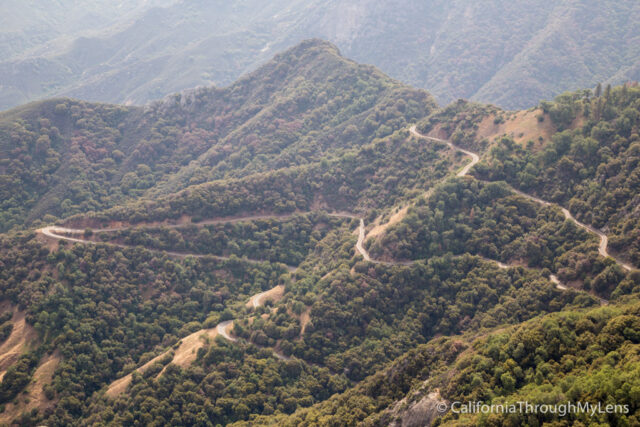
Like I mentioned before, the road to get up here winds around a lot, and I found it fun to see it from this vantage point.
After spending some time at the top, you simply make your way back down the stairs. It is a little more intense heading down as you can see how high you are, but I am afraid of heights, and I did fine on this hike.

Sunset
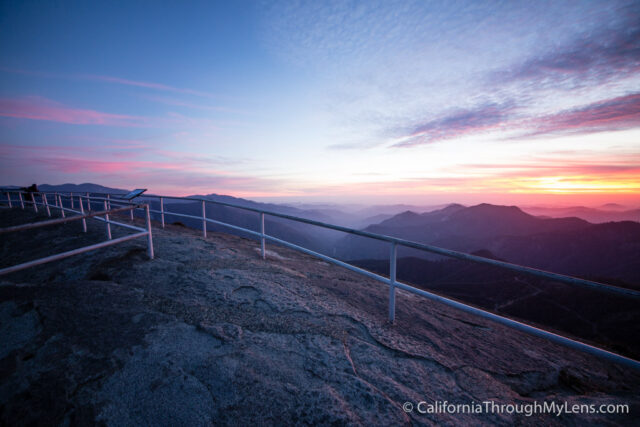
Moro Rock at sunset is one of the best places I have ever seen the sunset at. It was incredibly clear, and the colors danced beautifully on the horizon as it changed from yellow to orange to red. It is something I highly recommend you check out while in the park.
I would recommend heading up the rock about an hour before sunset is supposed to happen; this will give you ample time to get up the rock and set up your shot.
On the top of the rock, it is usually pretty easy to find a spot near the railing to set up a tripod and wait for the fun to start. When I was there we had about 15 or so other people up there will us but the top is so big that it isn’t a big deal and there is room for everyone. I would recommend bringing a flashlight or headlamp for the walk down in the dark.
Night
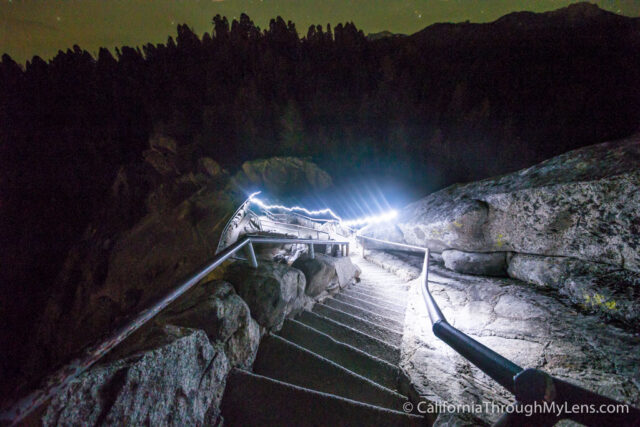
At night Moro Rock is also a great destination in the park. It can be a little sketchy though, so only go if you are prepared and make sure to have a flashlight as you do not want to navigate the steps without one. You can see a light trails shot of going up the stairs below.
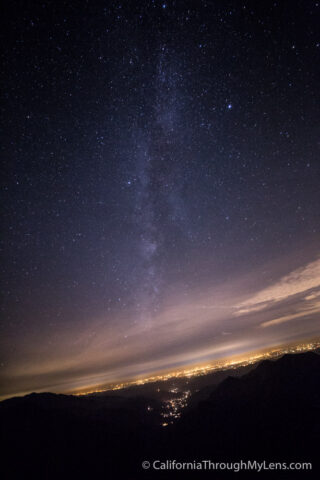
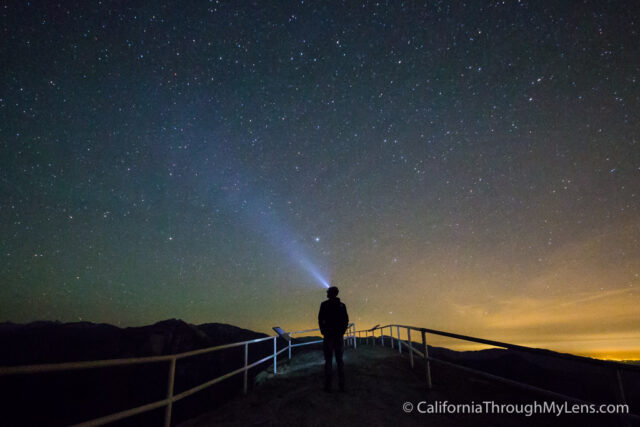
When you get up to the top, I would recommend setting up the tripod and working on your settings. I like to shoot a few shots towards Fresno as it can be awesome to see the milky way above it if it is the right time of year.
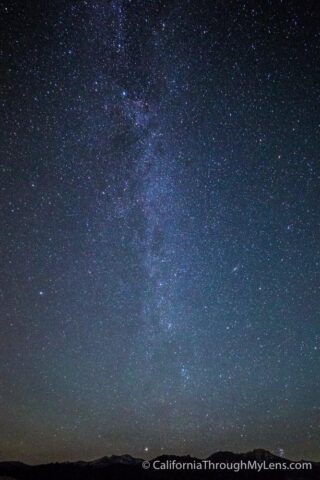
Also, the view over the Great Western Divide is incredible as well, and has less light pollution so you can see the stars better. I also tried testing out a few headlamp shots, as this was a good spot for it. After you are done, grab your light and start making your way down the rock. I would recommend bringing a friend with you on the adventure as it can be a little remote at night-time.
Overall this is one of the best short hikes you can do in California. It has adventure, views, and a workout. Make sure to add it to your list and let me know in the comments if you have been. You can read more about Sequoia National Park here.