Hiking Mt Shasta via the Avalanche Gulch Trail
Mt Shasta is a 14,180 foot volcanic peak in the northern part of California, only an hour or so from the Oregon border. Hiking to the summit is 11 miles round trip, but it is the hardest hike I have done to date and something you absolutely need to be prepared for. With the right training and gear though, you can make it to the top of this mountain, and the adventure it takes you on is something you will not soon forget. Here is all the information.
Safety Warnings
- People die on Mt Shasta (not often but it happens) so do not take the climb lightly
- Be sure you have an ice axe, helmet, mountaineer boots and crampons for early to mid-season climbs. Also, make sure you know how to use an ice axe to self-arrest and stop yourself if you slip
- The mountain is most accessible to climb when there is some snow cover as it would be loose volcanic rock without snow and it would be a miserable climb. The regular climbing season is May – July, but it could be free of most snow by early/mid July depending on the year.
- Get an early start on your summit day as you want to be through Red Banks before the sun comes up and warms it up, which can cause rock/snow fall.
- Make sure you train for this hike, I recommend squats or climbing on a stair stepper, plus hiking with a pack, so you get a feel for carrying the weight needed to summit. At the end of the day though, it is as much a mental challenge as it is physical. Being able to push through when you are tired and climb uphill when it is really exposed is what is needed to accomplish this hike.
- See my gear list here
Details

- 11 miles round trip
- 7,000 feet of elevation gain
- Recommend doing it in two days, with a Helen Lake being the standard base camp spot
- Must get a self-issued permit at Bunny Flats, the cost is $25 and bring cash. You can also get a permit at 5th Season Gear Shop if you rent boots and want to use a credit card
- I rented mountaineer boots, crampons, and gaiters from 5th Season in town, and it was a great spot with knowledgeable people.
- Must pick up a wag bag as you have to pack out your waste, should you need to use the bathroom on the mountain.
- Other hikers on the trip with me: Jeff, John, and Amie
- I did this hike in June of 2018
Video
Here is my video I made on the entire hike.
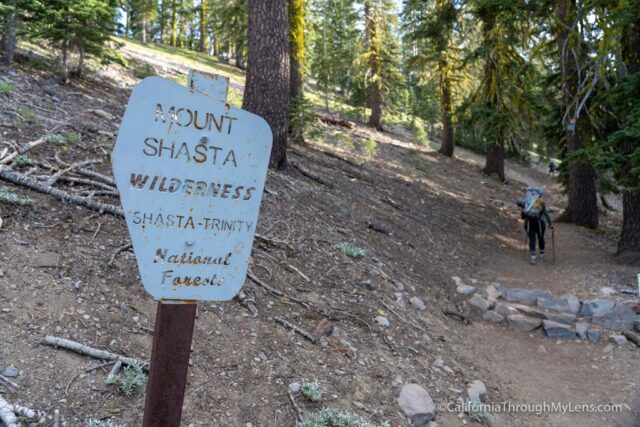
Getting There
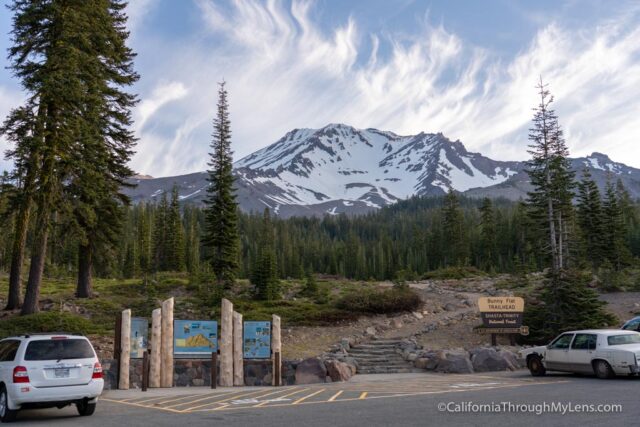
The hike starts from Bunny Flats, which is about 25 minutes from the town of Mt Shasta. There is lots of parking here in the lot, and there are pit toilets as well. Some people elect to camp here the night before, but I stayed at a hotel in town so I would get a good night’s sleep.
The Hike
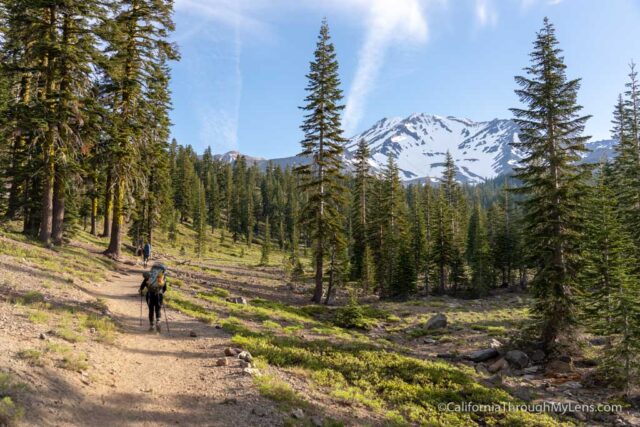
From Bunny Flats, you will be able to see Mt Shasta in the distance, knowing right from the start what you are getting yourself into. I recommend starting early as the hike is very exposed after Horse Camp with no way to hide from the sun until you get into your tent. An early start gets you to the campground at a decent time, and you can hide from the sun in your tent to protect yourself from sunburn.
The hike from here to Horse Camp is the easiest part of the trail, so enjoy it while you can.
It goes through a sparse forest with a gradual 1,000 foot incline over the 1.5 miles.
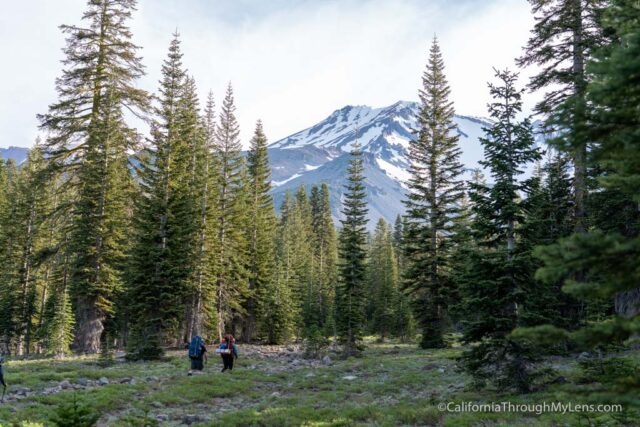
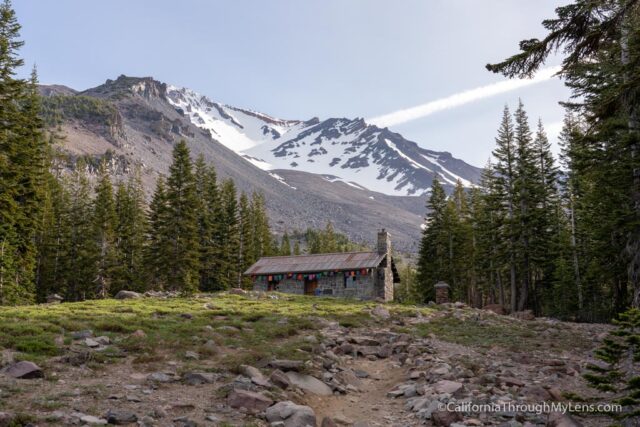
Horse Camp
Eventually, you will see Horse Camp, and this is a great place to take off your backpack and relax for a little bit.
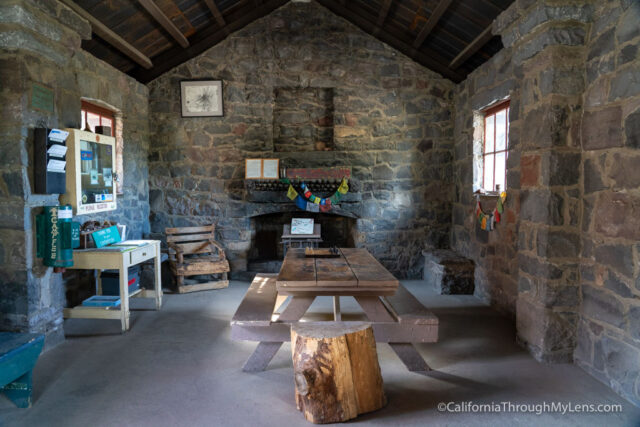
The old lodge building has been there for almost 100 years, and it is where John Muir began his summit hike. There is even a small library with books on Mt. Shasta and a chess set you can play.
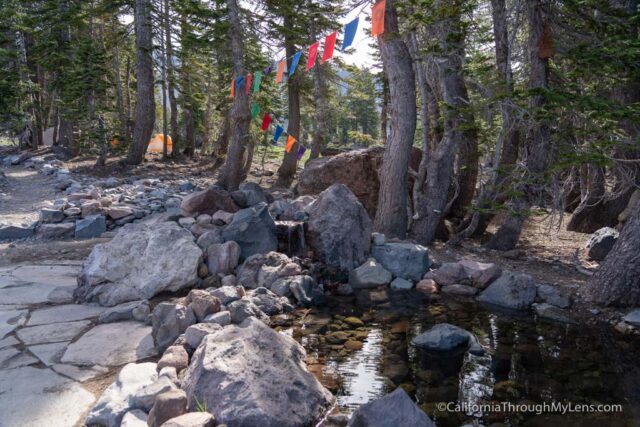
Horse Camp has a seasonal waterspout that pumps water from the small spring. I was told the water was perfect here, and I can say it lived up to that designation. It is the last place to get water on the hike without melting snow.
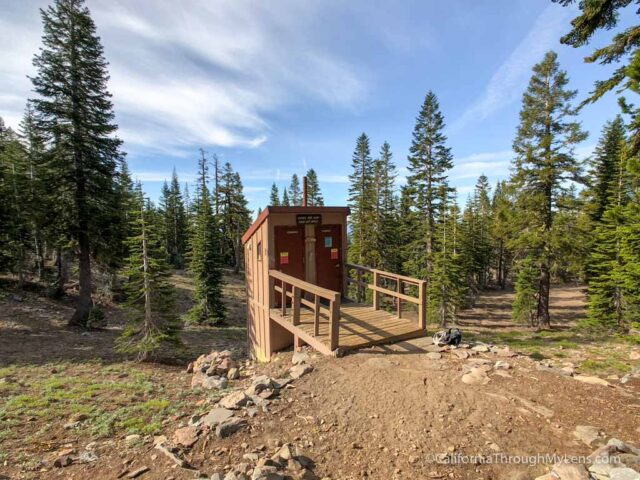
There are also nice composting toilets at Horse Camp with toilet paper and hand sanitizer. This is the last bathroom stop before you have to use the wag bag on the mountain.
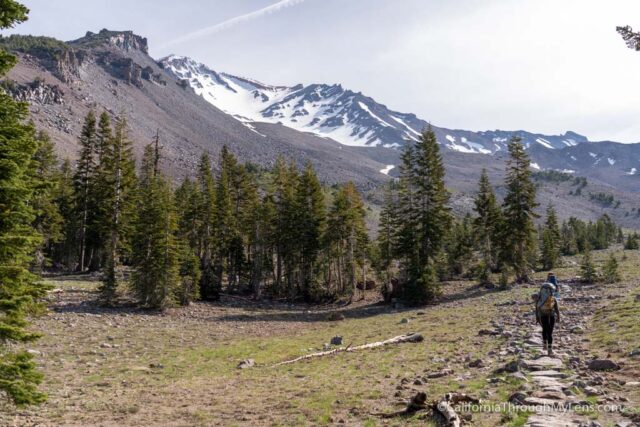
From here, the trail crosses a small meadow area as it leaves the tree line behind for exposed hiking the entire rest of the way.

When you get to the base of the hill and see the switchbacks in front of you, you will start climbing and will be doing that for the rest of the hike.
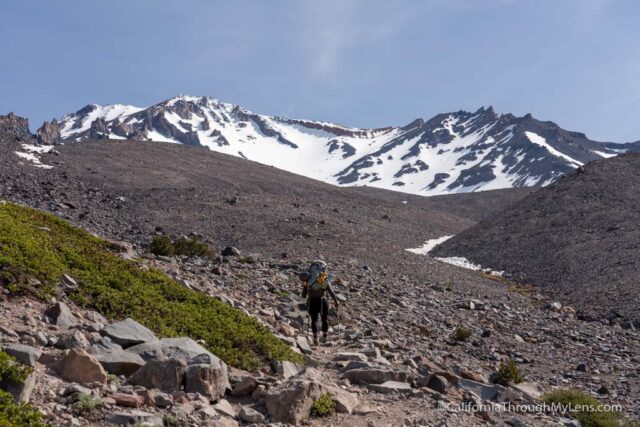
This portion of the trail can be covered in snow early in the season, which makes it a little easier, but when we went, it was just a dirt path with loose rock, so it was slippery as you headed uphill.
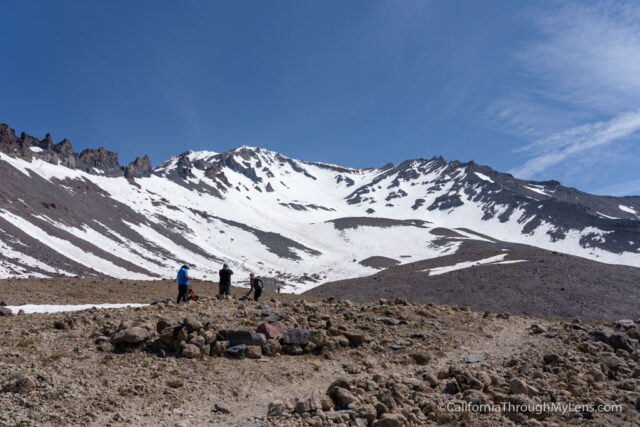
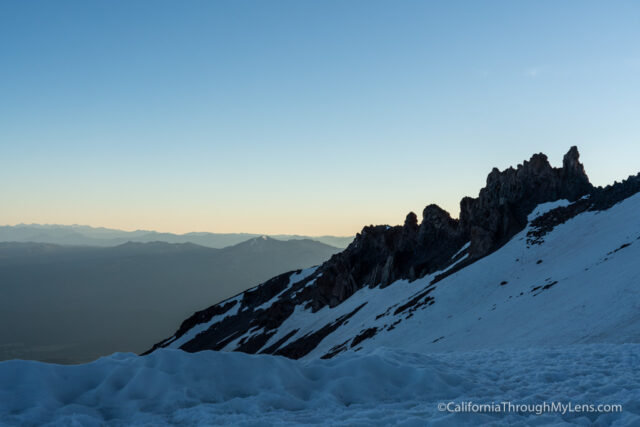
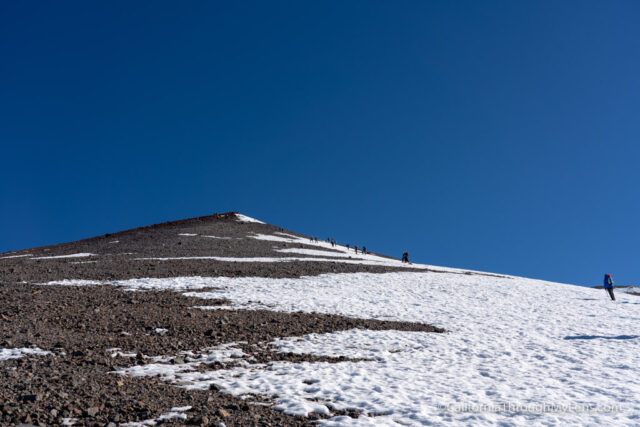
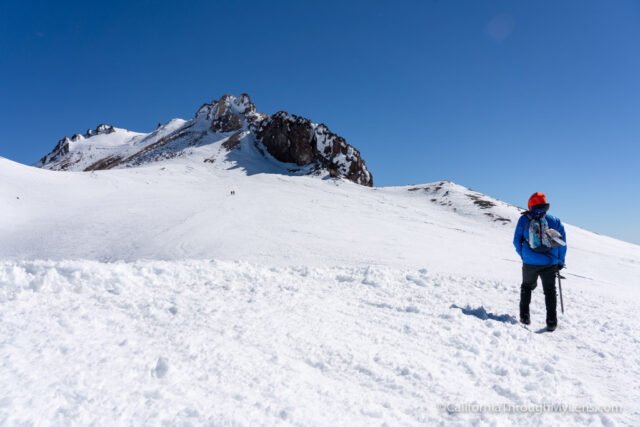
Reaching the top of this small hill gives you your first real views of the Helen Lake area and Red Banks above it as you proceed forward to 50/50 Flat.
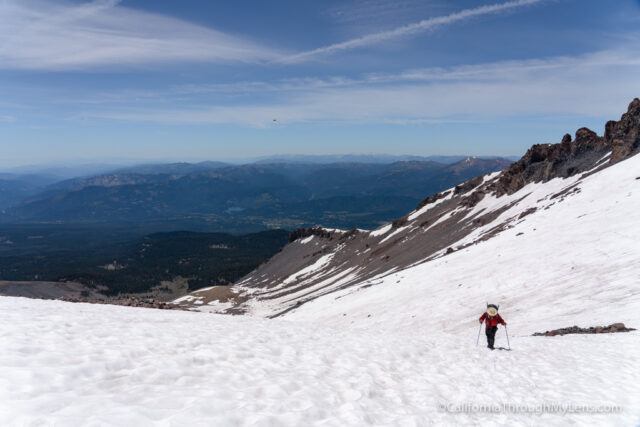
50/50 Flat
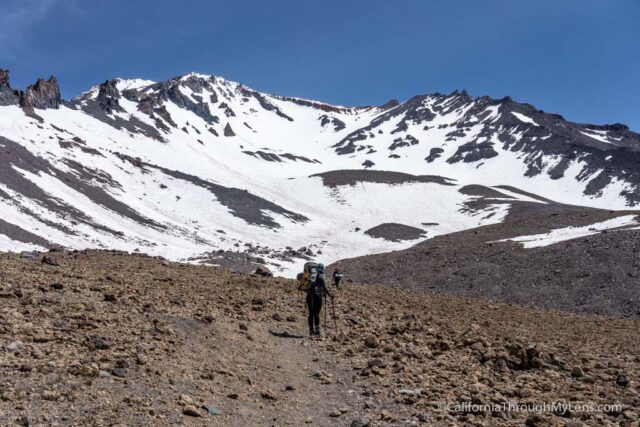
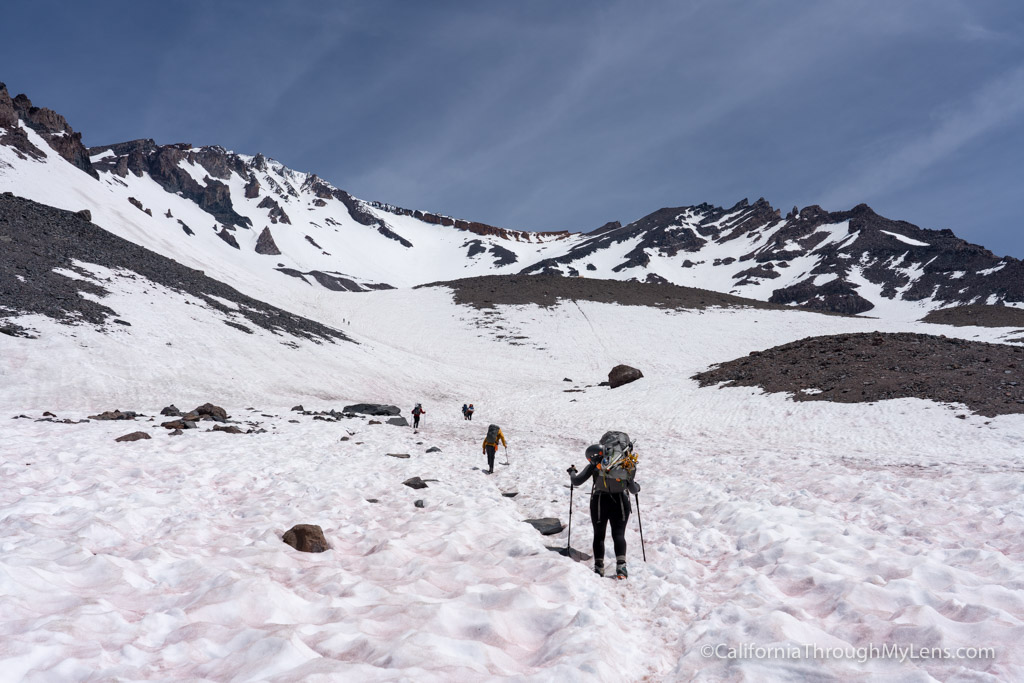
This section is the best introduction to what you will be doing during the day two summit ascent. It is steep, and there is usually snow. It is made worse by the large pack you have with your gear.

Take your time here as you gain elevation and use trekking poles, so you don’t slip. Sometimes crampons are required here as well, depending on the snow level, but it wasn’t for us when we went.
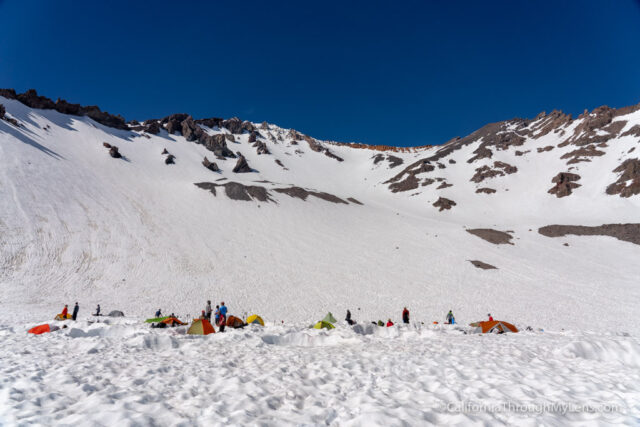
When you reach the top of 50/50 flat, you will be at Helen Lake, your stopping point for day one.
Helen Lake
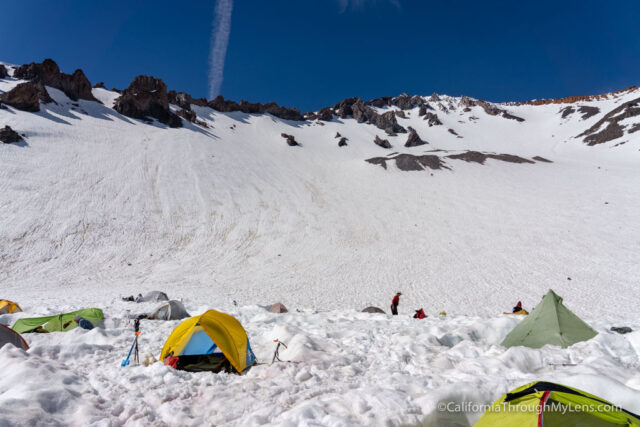
We got here at around 1 PM and found an already shoveled out area to set up our tent.
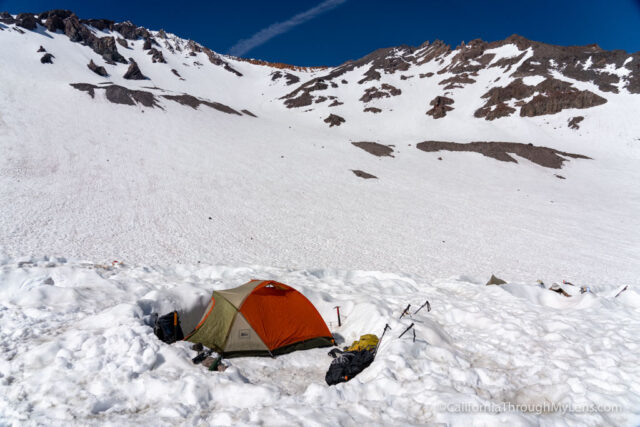
After setting everything up, we spent most of the day in the tent hiding from the sun. Even with sunscreen, it can be brutal up here, and you don’t want to start the next day burnt and dehydrated.
This area is situated on a small frozen lake, but the lake is pretty much always frozen, so it is generally safe to camp.
There is a “bathroom area” here as well, which is basically a small hole in the ground to the right of the tents that says “urinate here.” Also, there is a carved out area where you can squat down away from people next to that as well for other business. Needless to say, you want to get the snow you are melting for water up from the other side of the camp.
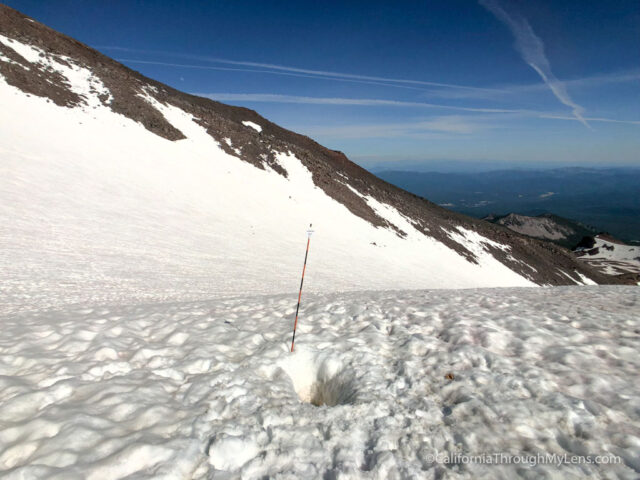
Also, it takes a long time to melt snow, so make sure you have enough time at camp to melt snow to filter, or boil it for a few minutes so you don’t have to filter it. We were melting snow for at least an hour to two to have enough for dinner, drinking at camp and the summit push the next day.
Sunset can be beautiful since you have some great views of the surrounding area, and the sun going down protects from the heat.
When the sun goes down, most people go to bed since the summit push starts early.
Day 2
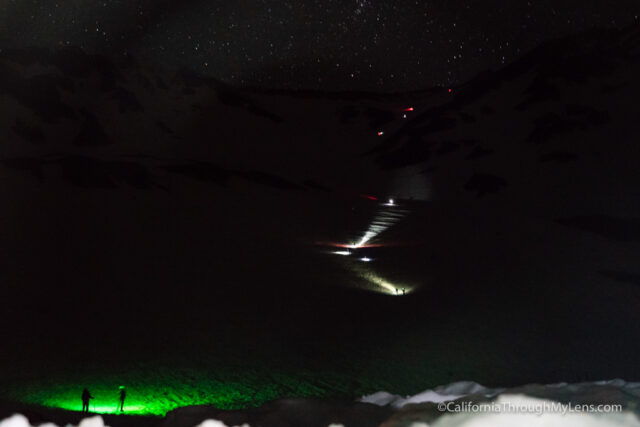
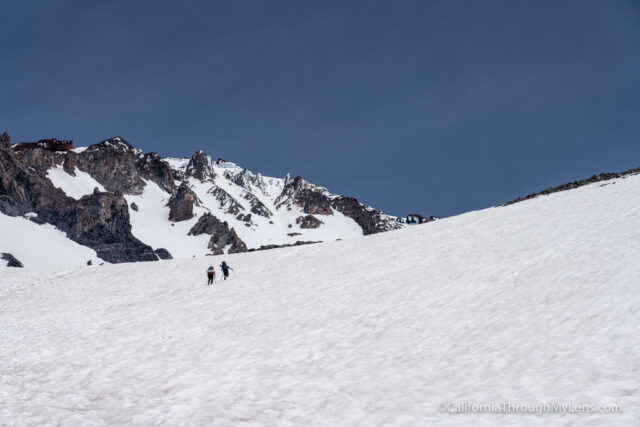
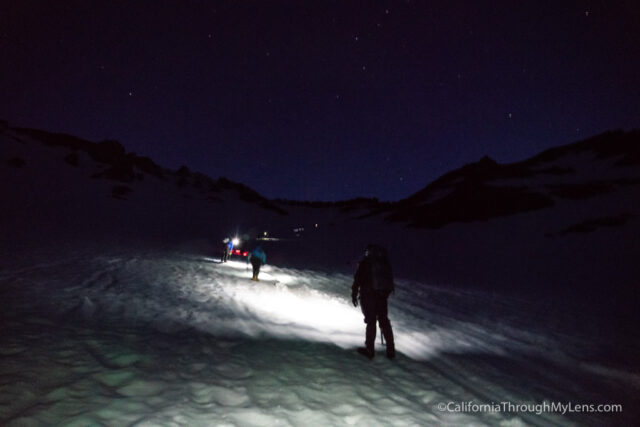
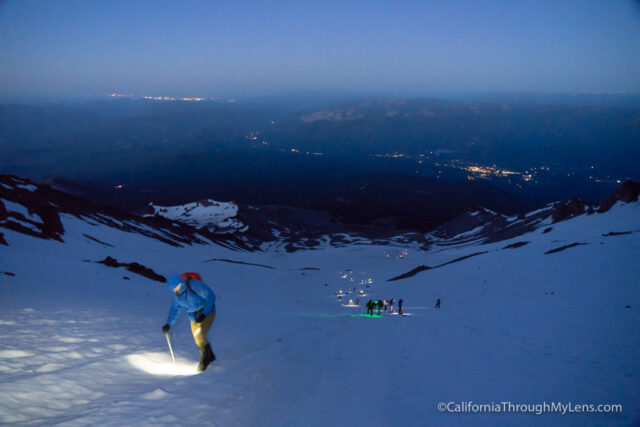
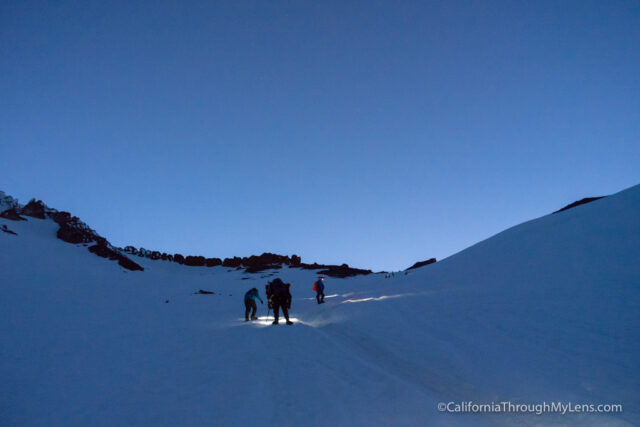
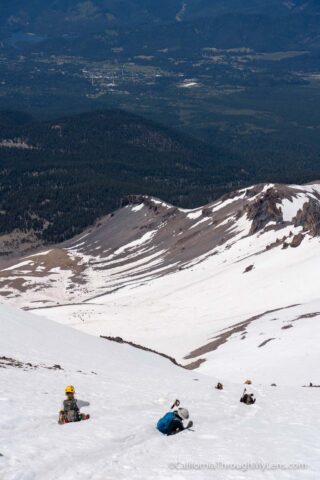
We set our alarms for 2 AM and were up, had breakfast, and ready to hike by around 3:20. From here, it was headlamps, crampons, ice axes, and helmets as we started the toughest part of the climb to Red Banks.
Basically, this portion is only .8 miles or so, but it is uphill at a 30-40 degree angle the entire time.
It’s not bad in the beginning, but once the sun starts to come up and you continue climbing up the hill, you realize how exposed you are and how steep the drop off is behind you.
It is pretty insane as there are not any parts to take a break, so you take a few steps then just stand at an angle on the hill with your ice axe in the ground to prevent you from slipping.
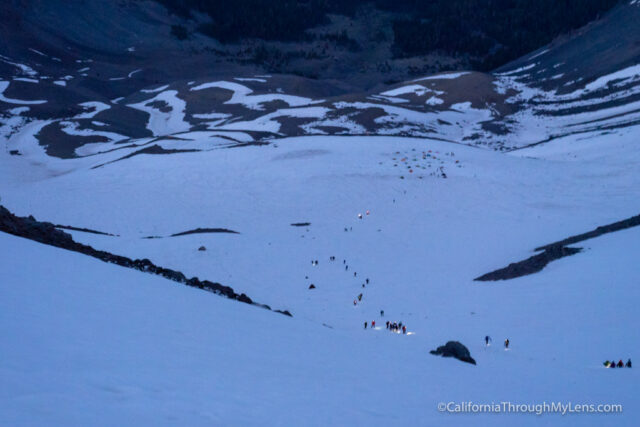
For us, it took about 3.5 – 4 hours to get through this section, and it is by far the hardest part of the hike.

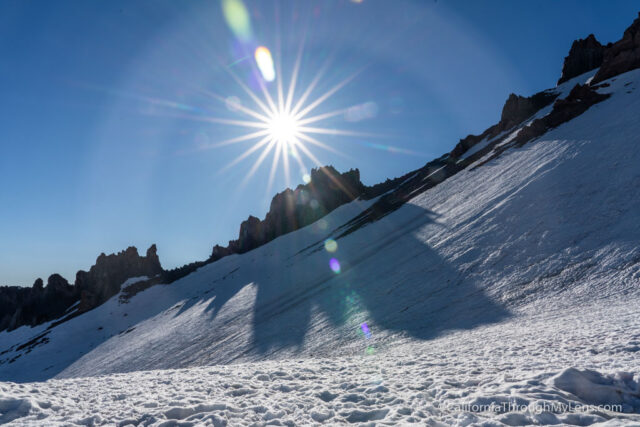
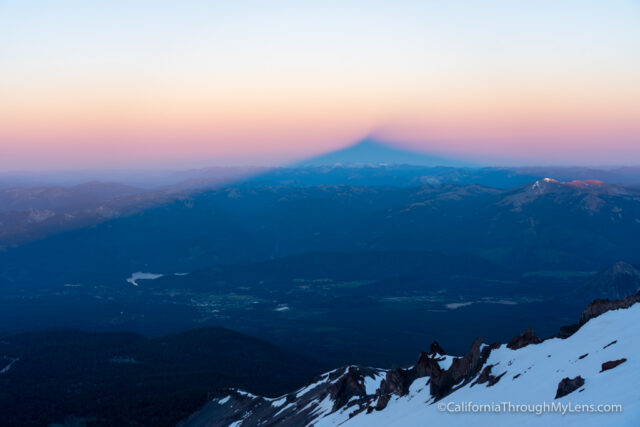
The only respite was when the sun started to come up, and we saw the triangular shadow of Mt Shasta behind us.
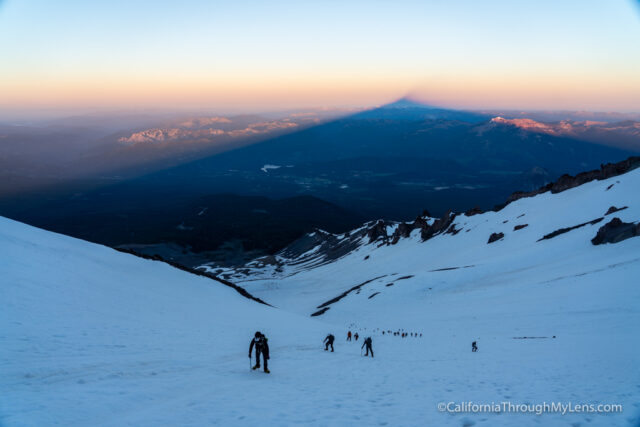
This was one of the coolest things I have seen while hiking, and everyone took a break to look back at it.
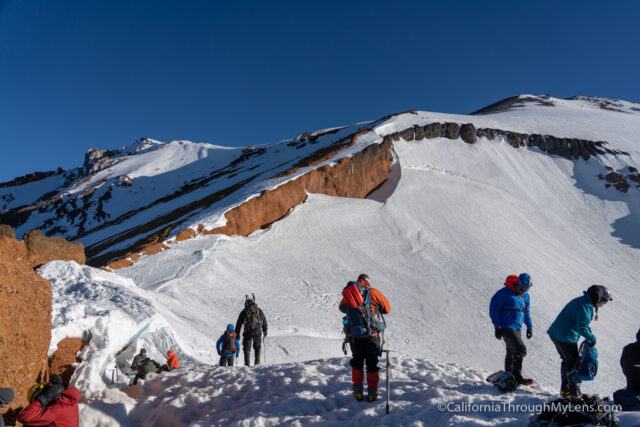
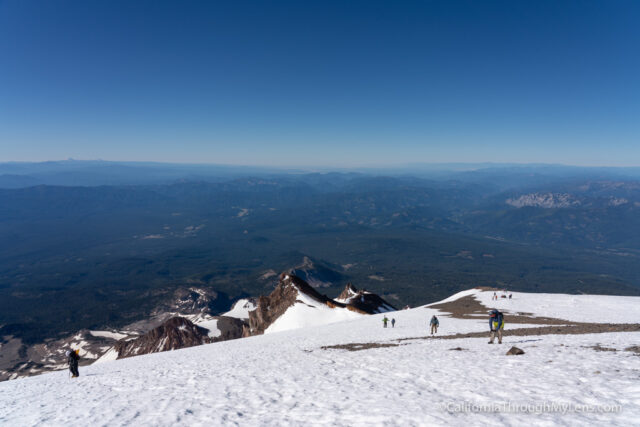
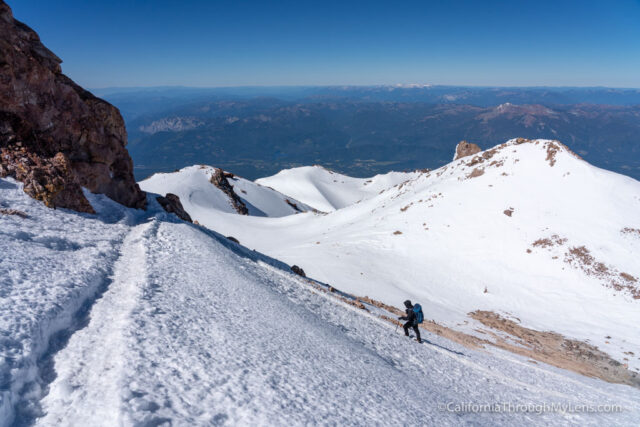
After more climbing, we finally got to the top of the Red Banks.
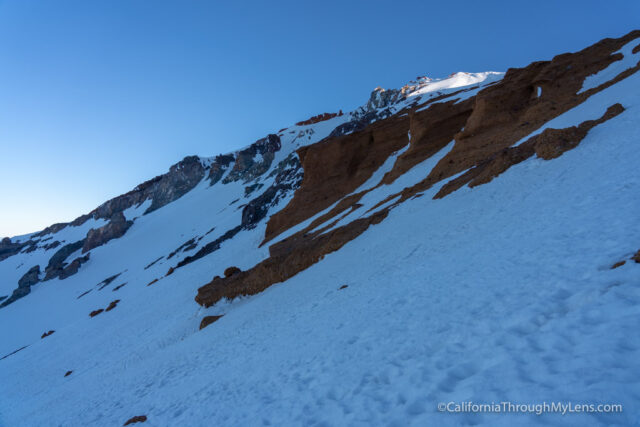
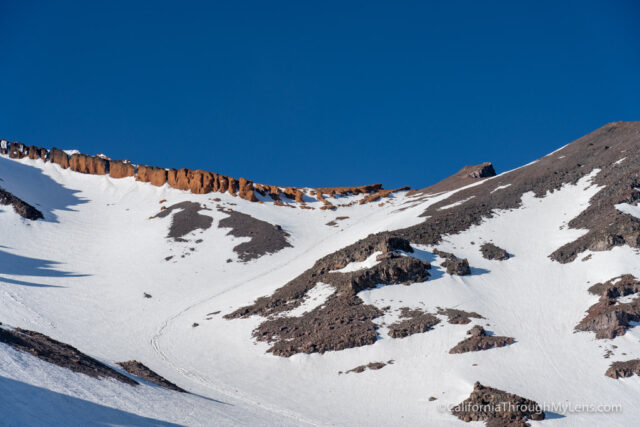
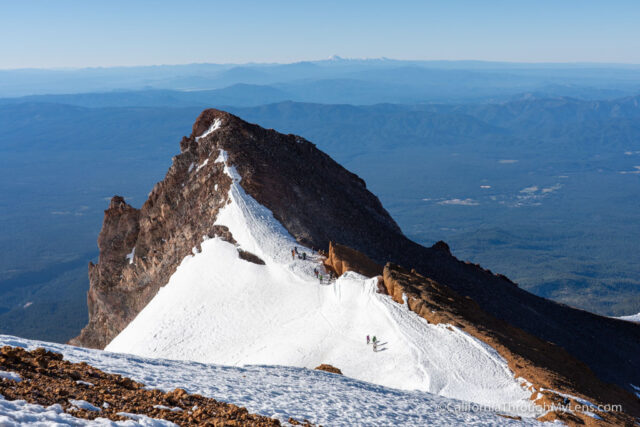
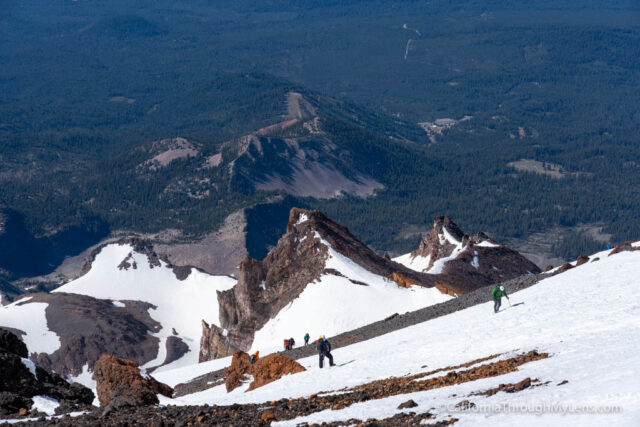
Red Banks
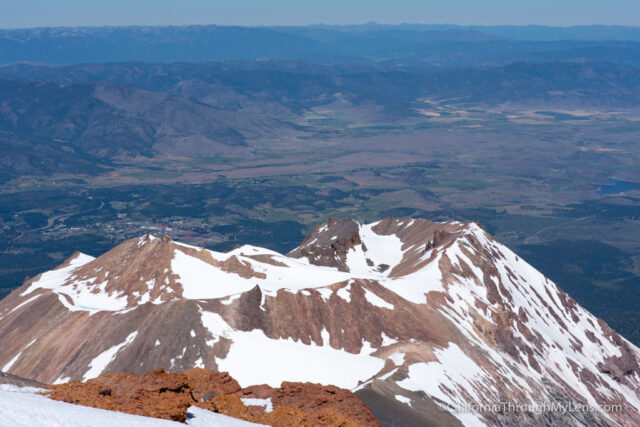
Red Banks is your destination for the first part of the hike, and they are the red rocks you see on the ridgeline above you pretty much the entire hike.
Depending on the snow, you may be able to go up between Thumb Rock and the Red Banks, which is easier, but if the snow is not there, you have to go up one of the chutes between the rocks in the red banks. These are steep, and be sure to give people space as you climb up as there is little room to get out of the way if someone falls.
Getting here is quite an accomplishment, and I know many people that have turned around before Red Banks because of how tough it is. I would never fault anyone who turned around before the Red Banks; it is a very tough, exposed climb for sure.
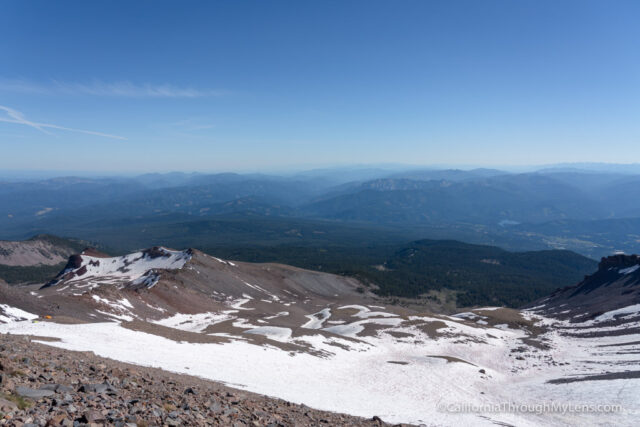
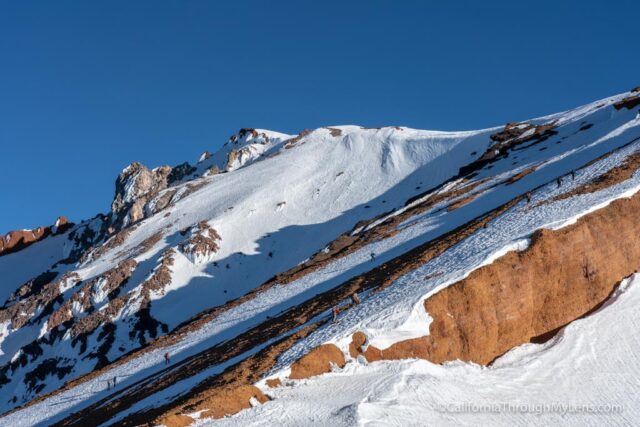
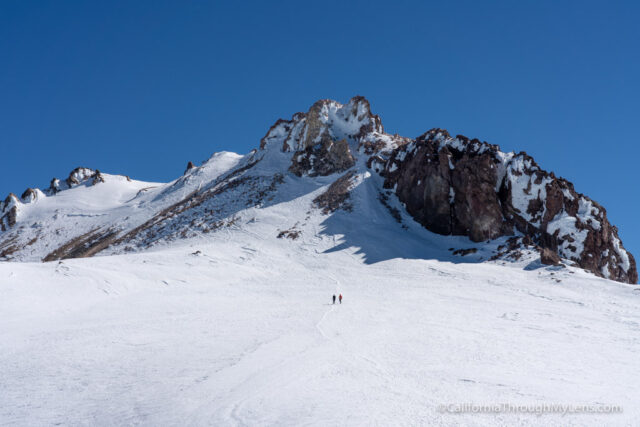
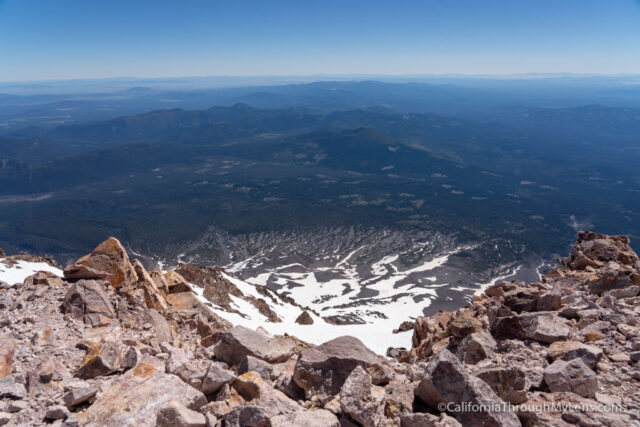
Getting to the Red Banks gives you views of the rest of the hike (still about 1,700 more feet to go). It also looks down on a glacier, and it is an excellent place to stop for a break before heading on. From here you will continue across a small flat portion to the next hill.
This is another steep hill with lots of exposure and more uphill snow climbing.
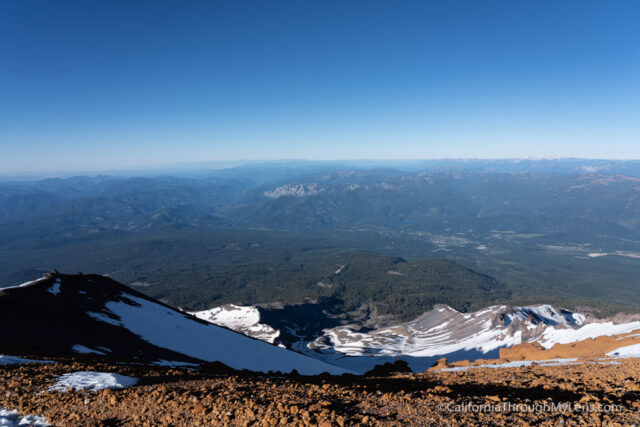
The views get pretty amazing here though, as you can see about 180 degrees around you. Take your time on this part, putting one foot in front of the other to get to the base of Misery Hill.
Misery Hill
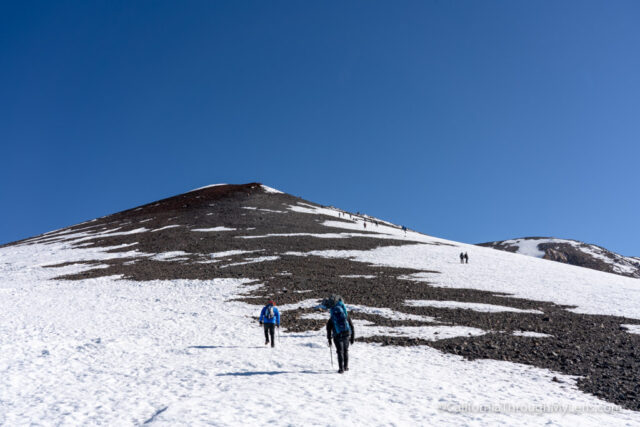
There are a couple of false summits on Mt Shasta, and this is the most famous.
It looks like Misery Hill should be at the top of the hike, but know that it is not.
Misery Hill is just a slog for about 600 feet up another hill with lots of exposure. It provides more beautiful views, but it can also have a lot of wind, as there is not much stopping the wind now.
When you make it to the top of this hill, you will be getting very close to the summit.
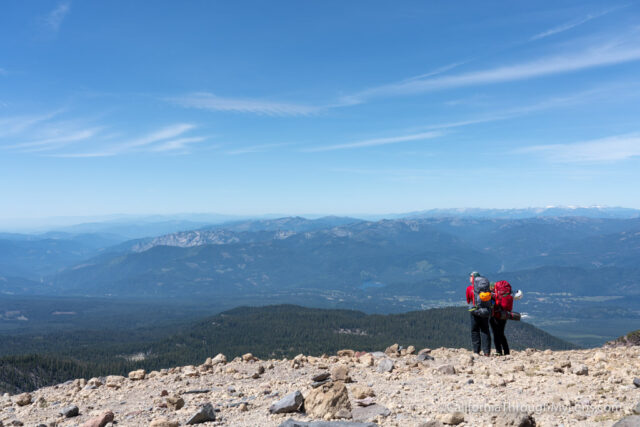
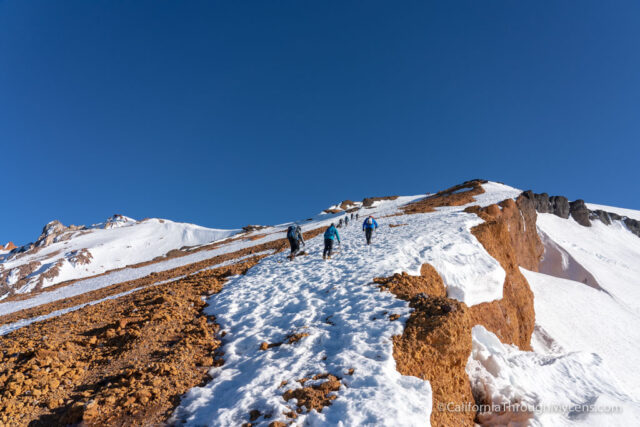
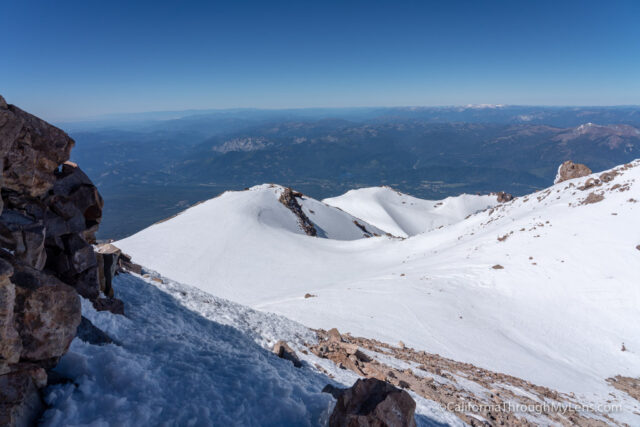
From the top, you walk along the ridgeline and will finally see the rocky summit in view.
There is one sizeable exposed field of snow separating you from the last push to the actual summit. For us, this section had 40 MPH winds, and it was insane just trying not to get pushed over while moving forward. Plus, you are at about 14,000 feet, so you are out of breath as well.
When you get to the base of the summit, you will see a small path to the left that takes you up and around the backside on switchbacks.
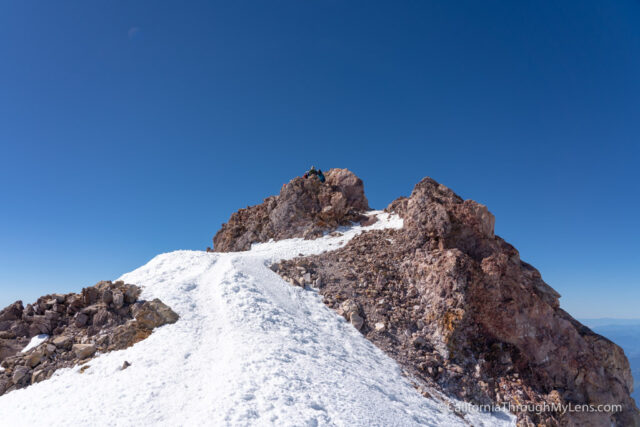
It is not as tough as it looks, and you will probably have adrenaline as you get closer to the summit. As you round the bend, there is one final part of the rock that you have to climb before you reach the summit of Mt Shasta.
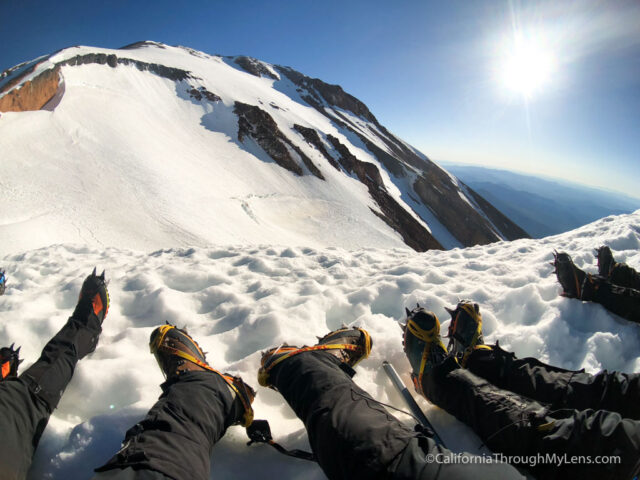
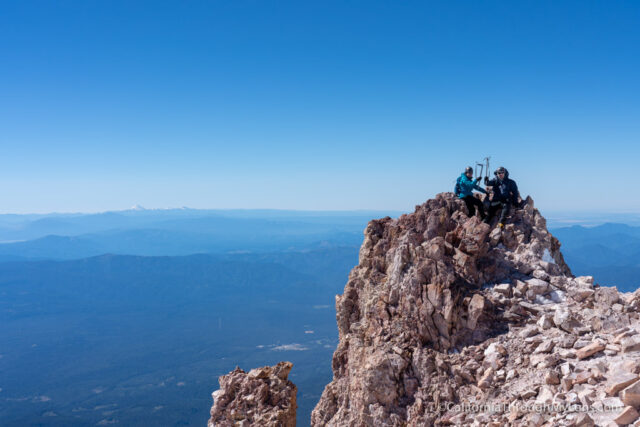
Summit
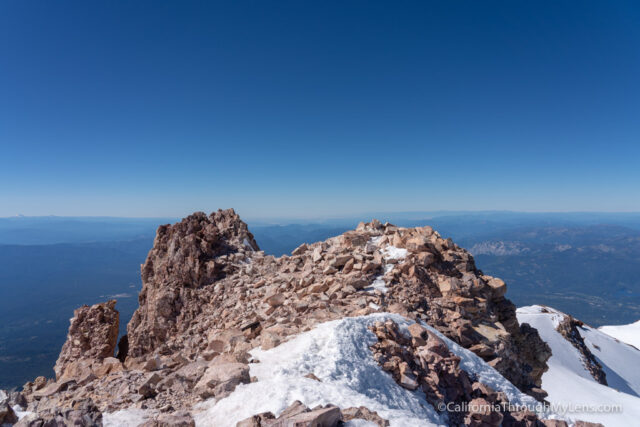
From here, it is all pictures, smiles, and signing the register.
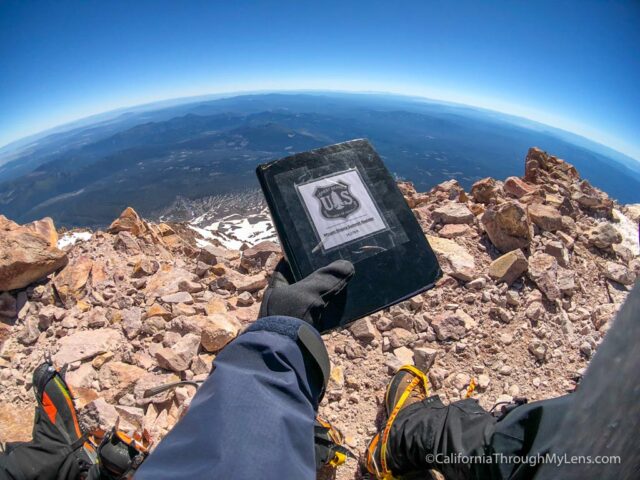
The high point is the far rock, and the area is not large, so there is usually a line to wait in to get your photo on the actual summit.
The winds were insane when we got there, so we were the only group and had the summit to ourselves for about 10-15 minutes.
After taking photos and enjoying it, we got off of the summit since the winds were going to knock us off if we didn’t leave soon. It took us about 6.5 hours to reach the peak from Helen Lake.
Do remember that getting to the summit is only half the battle; getting down is difficult as well. Also, most injuries happen on the climb down, so eat some food, drink some water and take your time.
The hike down to Red Banks was pretty fast as you are walking downhill for the first time in two days, and it feels nice. Do note that the snow can be pretty slushy, so take your time, and use the ice axe and crampons, so you don’t slip. When you make it to the Red Banks, depending on what time of day it is, you may be able to glissade (you need the snow not to be ice but also not to be too slushy).
Glissading is basically just sliding down the hill on your butt, and it is incredible how much fun it is and how fast it gets you down the mountain. Watch some YouTube videos on how to do this with your ice axe before going, and be sure to know how to self-arrest as you will use that in this section since you get going pretty fast.
Depending on how the snow is, you may be able to do this after Helen Lake as well, but it was too late in the season for us when we went. After getting back to Helen Lake, you will pack up all of your stuff, load up the backpack, and make the hike back out. This part is no fun, but you will at least be excited since you hopefully got to the summit, which it makes it a little more bearable.
When you get back into town, I recommend grabbing a hotel in Mt Shasta, so you don’t have a long distance to travel. I like the Best Western, which is an excellent spot to relax in town.
Climbing Mt Shasta is an amazing accomplishment, so congratulations if you make it to the top and if you read through this massive post. Be sure to let me know if you have any questions in the comments.